


I recently redesigned my IKEA FADO lamp for my partner’s birthday—I wanted to create something unique and clean, with mid-century lines. This design was inspired by Star Trek, the desert, and sunrise.


The FADO is somewhat of a cult classic in IKEA circles, living alongside icons like the ENETRI cabinet and VARMBLIXT lamp. It diffuses light beautifully—Instagram user @andrews_life calls it “the most cinematic lamp ever.” Personally, though, I think the FADO is quite ugly on its own, especially when turned off. It feels naked and clinical—both rooms pictured below could use lamps with more character.


Some people try to get around the FADO’s plainness with styling. Pairing it with candleholders, salad bowls, or stands can balance the form a little, but not enough for my taste. I still just see a lamp in a candleholder, a lamp in a salad bowl.


materials & tools
materials
1x 10” IKEA FADO lamp or alternative 10” globe lamp
Using the smaller FADO will require some modifications to the build templates.
1x Smart lightbulb with color-changing capability
I use IKEA TRADFRI bulbs.
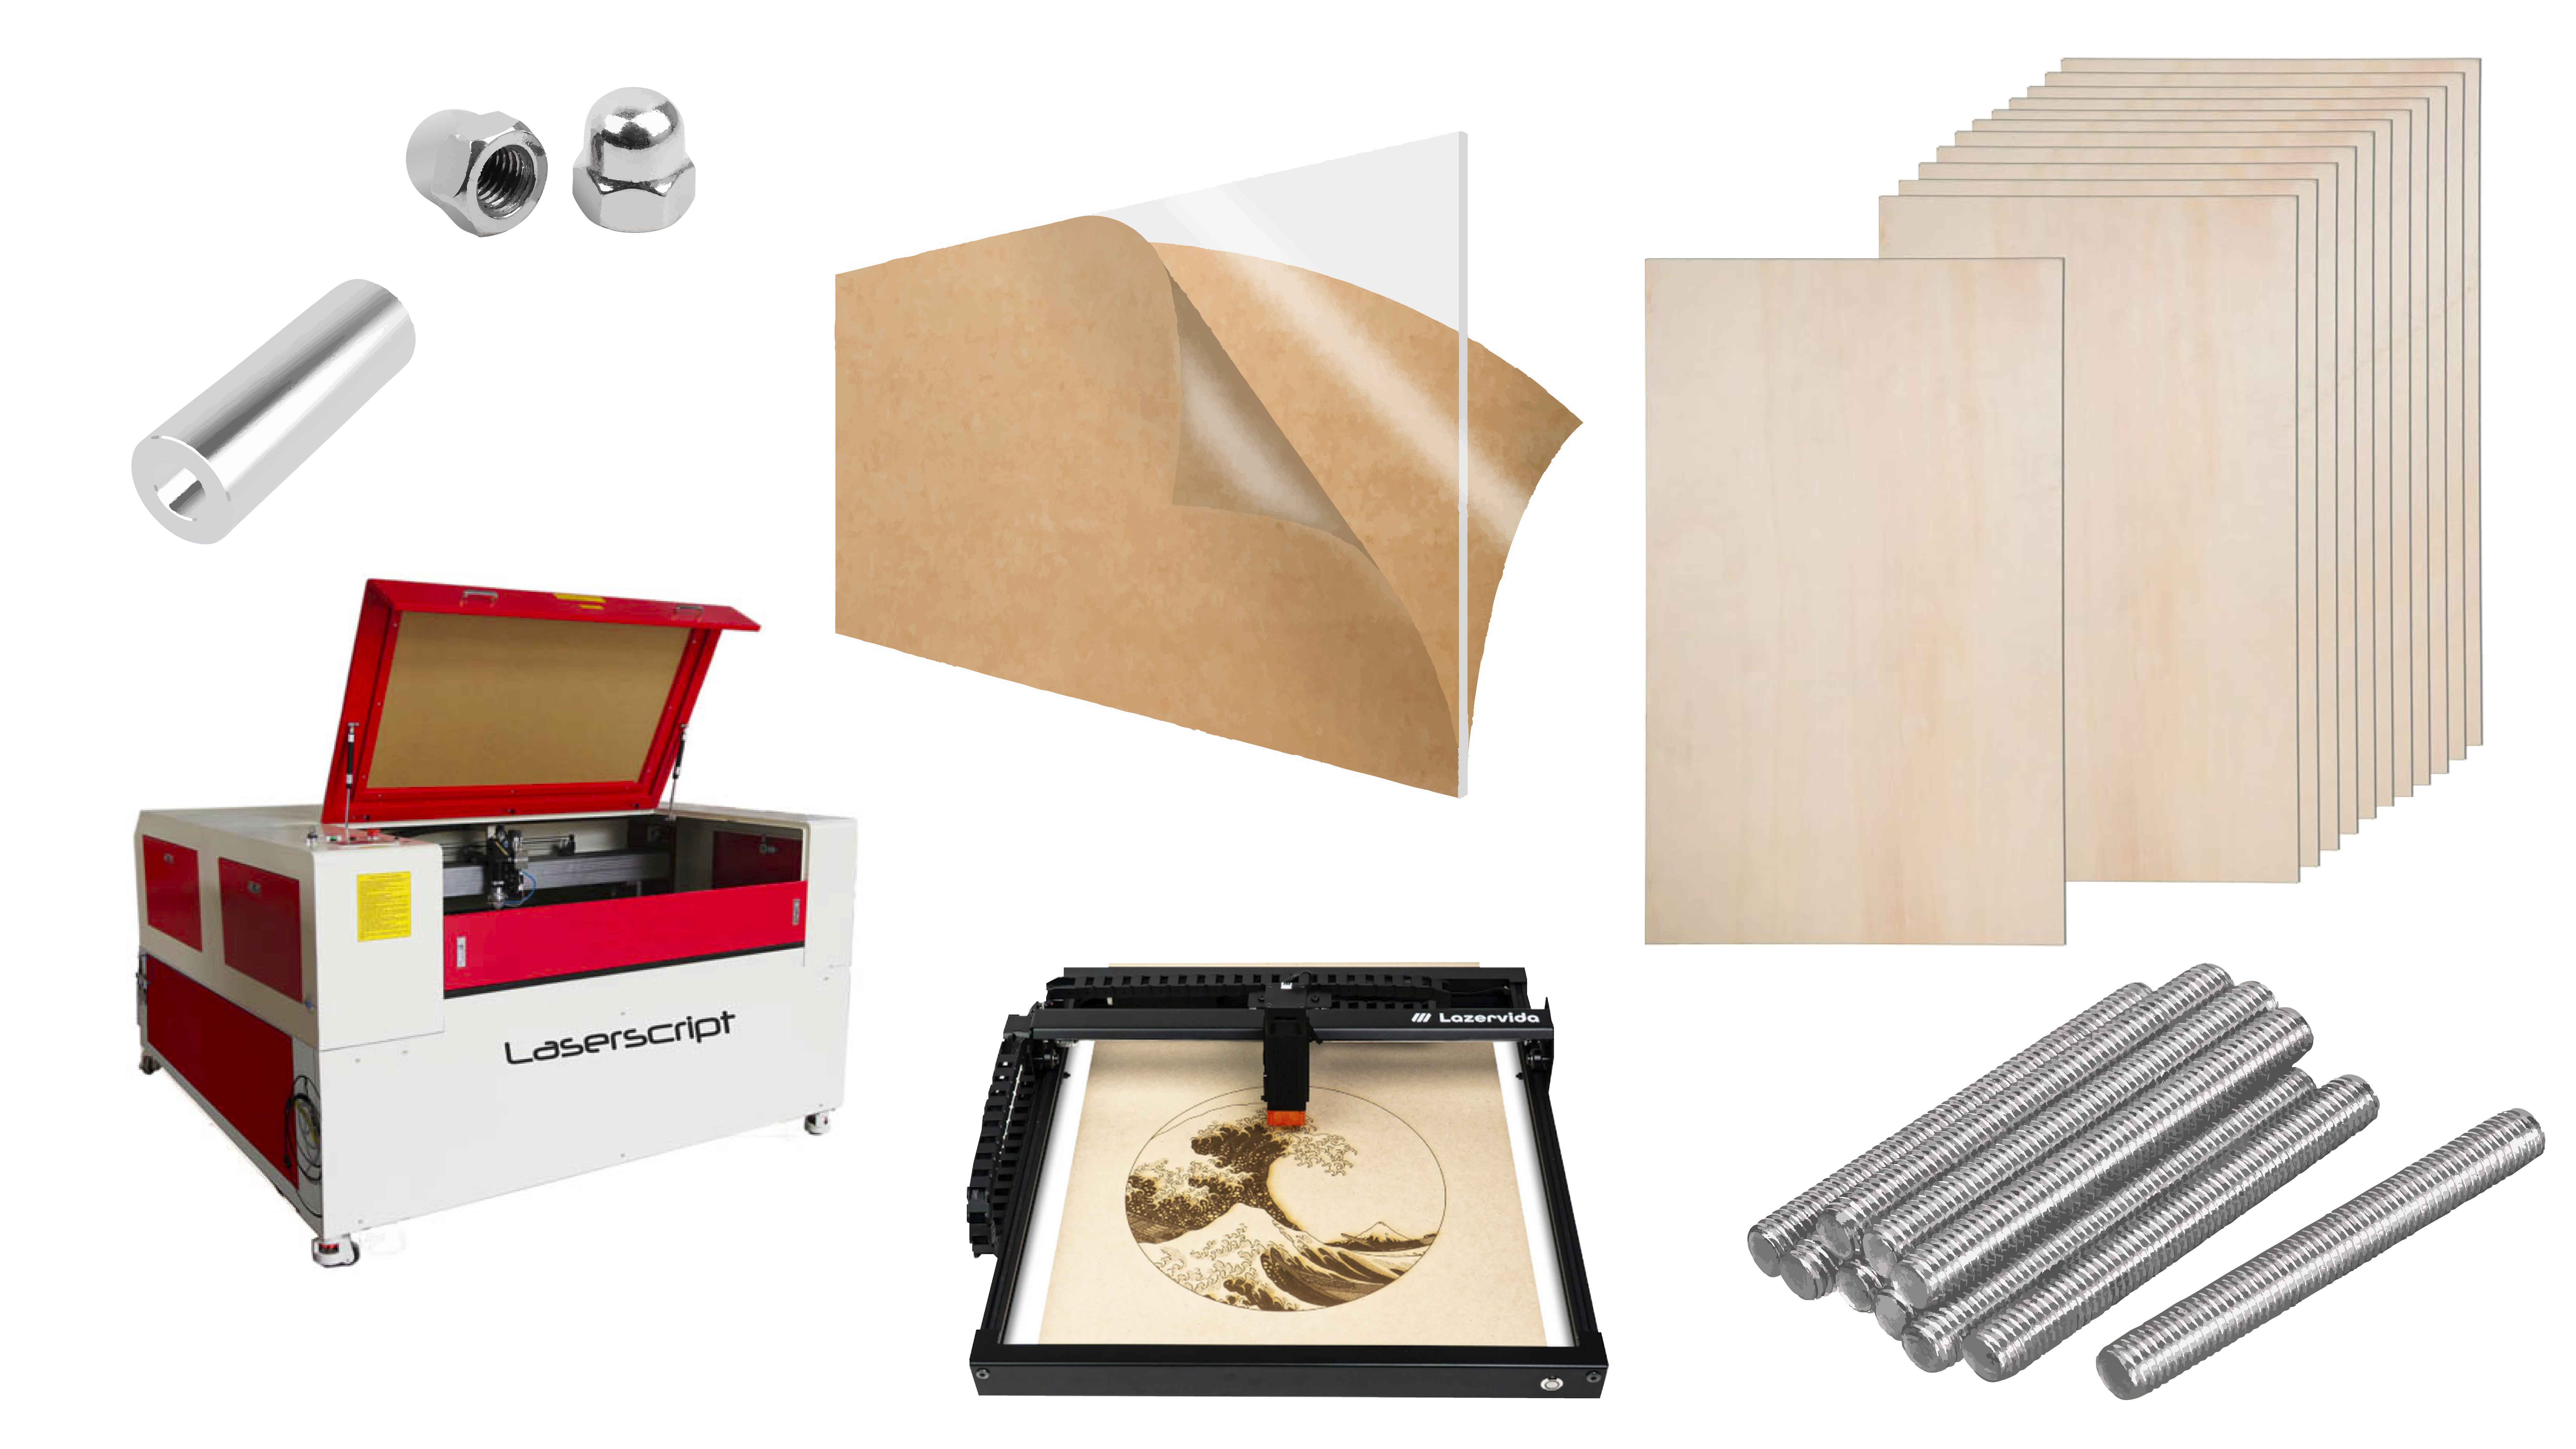
9x 1/8” thick 12”x24” laser cutting blanks
I used seven pieces of basswood and two pieces of clear acrylic to expose the lamp a little bit more. Feel free to change this out for a material of your choice!
6x 12” 8-32 threaded rods
M4 threaded rods are probably close enough, but be prepared to adjust holes with a drill or rotary tool.
6-12x hex cap nuts
Use six cap nuts if you’ll be keeping the “antenna” look, and twelve if you’d prefer to trim the threaded rods down.
48x 1” metal standoffs/spacers
Optional: Wood stain and clear MinWax if you’d like to stain any wood panels.
tools
Laser cutter
Any machine that can handle cutting an 11” circle on a 12” wide blank should suffice. Your local library, college/university or makerspace probably has one you can use.
Optional: If you plan to trim the threaded rods, you will need a metal saw.
Optional: If you will be staining wood, you’ll need some old socks and sandpaper.
creating a laser file
The Illustrator and DXF files I used for my cuts can be downloaded below ($21.50). This is the easiest and most affordable option for those who:
Do not already subscribe to Adobe Illustrator ($30/month)
Are not familiar with Adobe Illustrator
Do not already pay for CAD software ($85/month)
Are not familiar with CAD (Blender/Solidworks/Fusion 360)
If you have both access to and familiarity with Adobe Illustrator and Blender, instructions for how to create your own laser file are below. While I happened to use Blender for this project, these instructions are applicable to most CAD softwares.
blender instructions
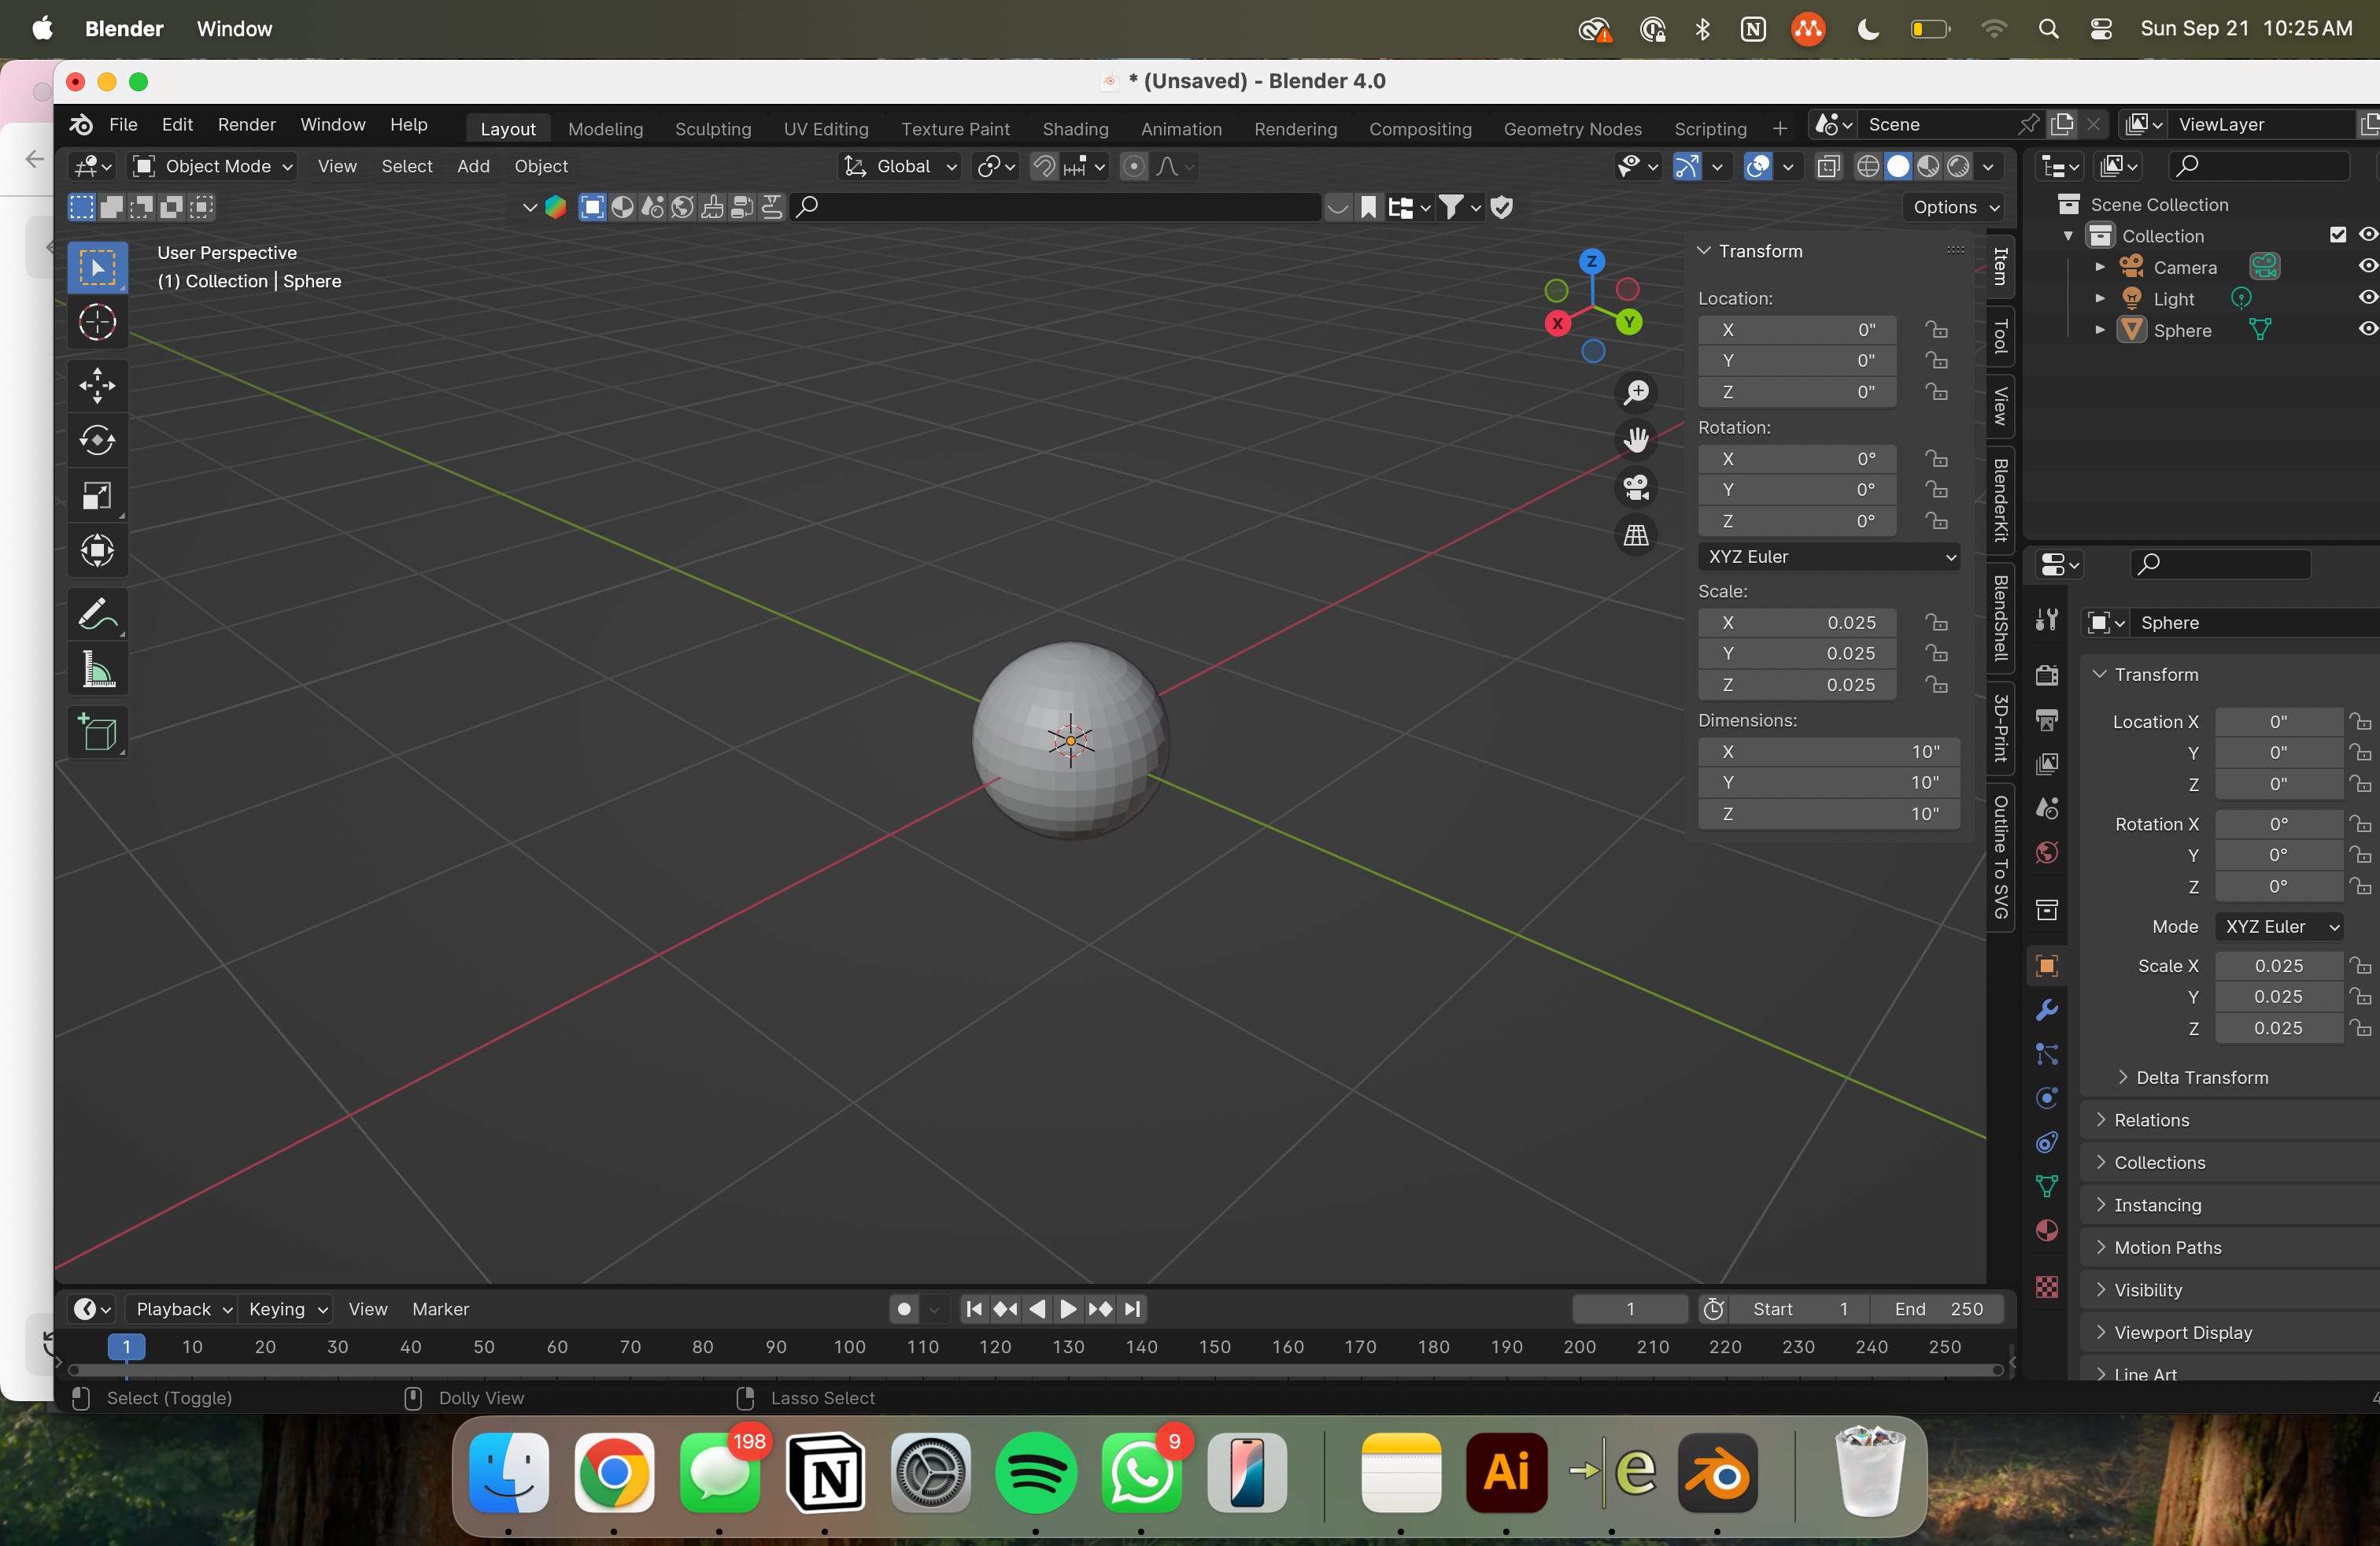
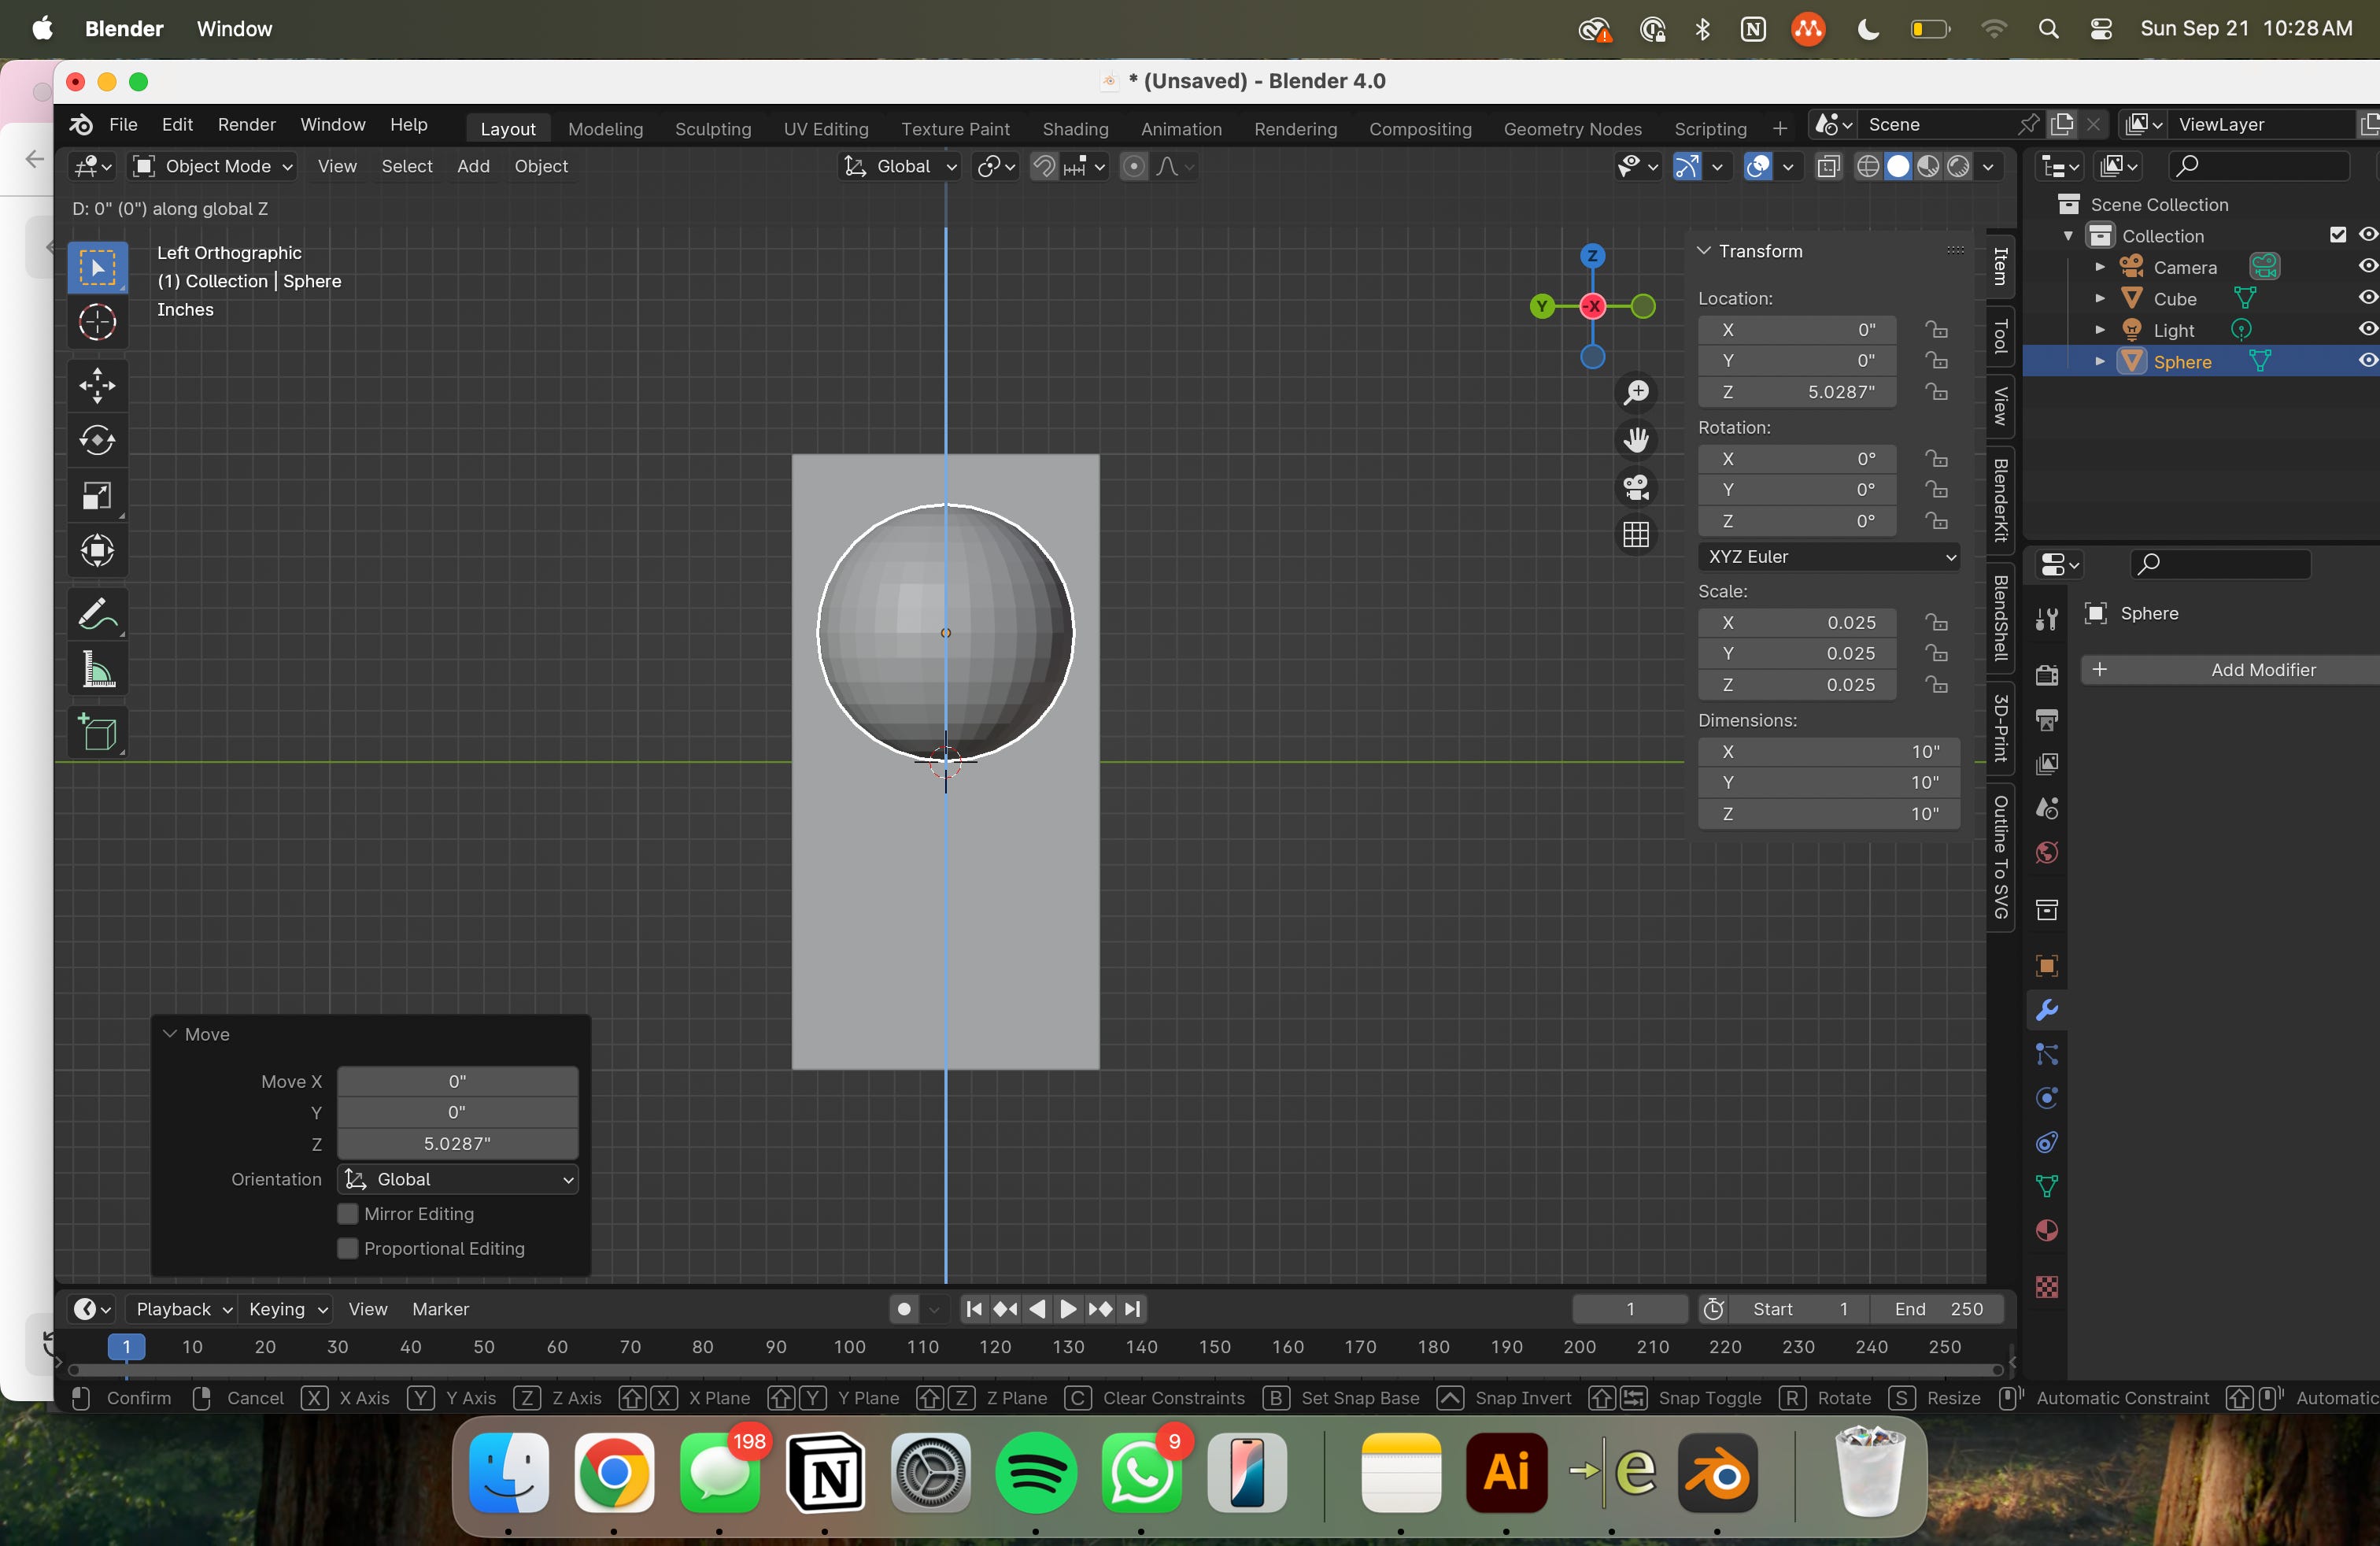
Add (Shift + A) a 10” UV sphere. This will serve as our FADO stand-in.
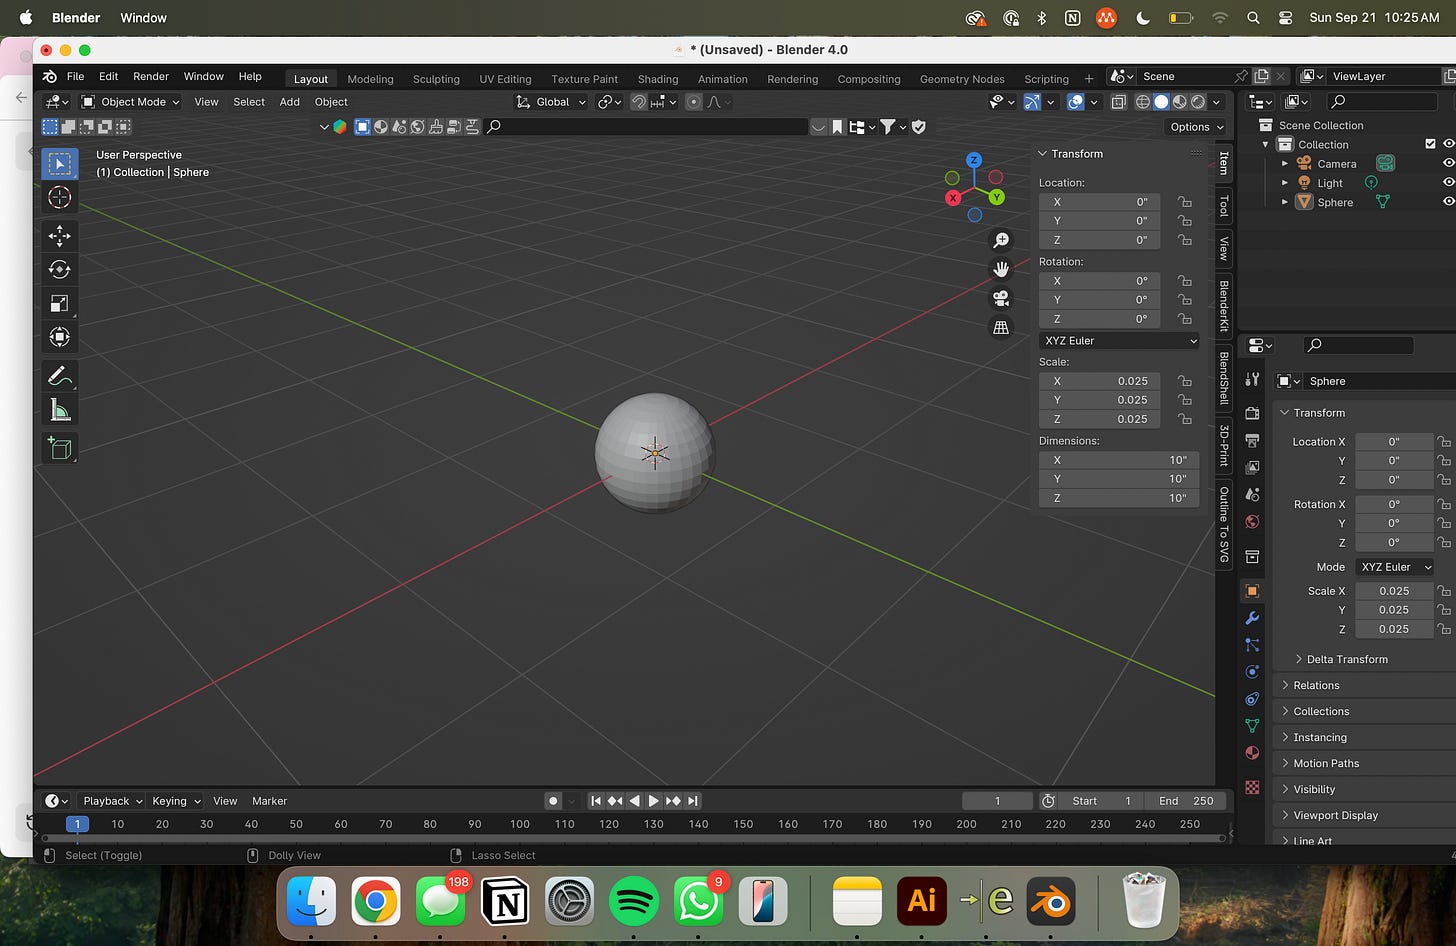
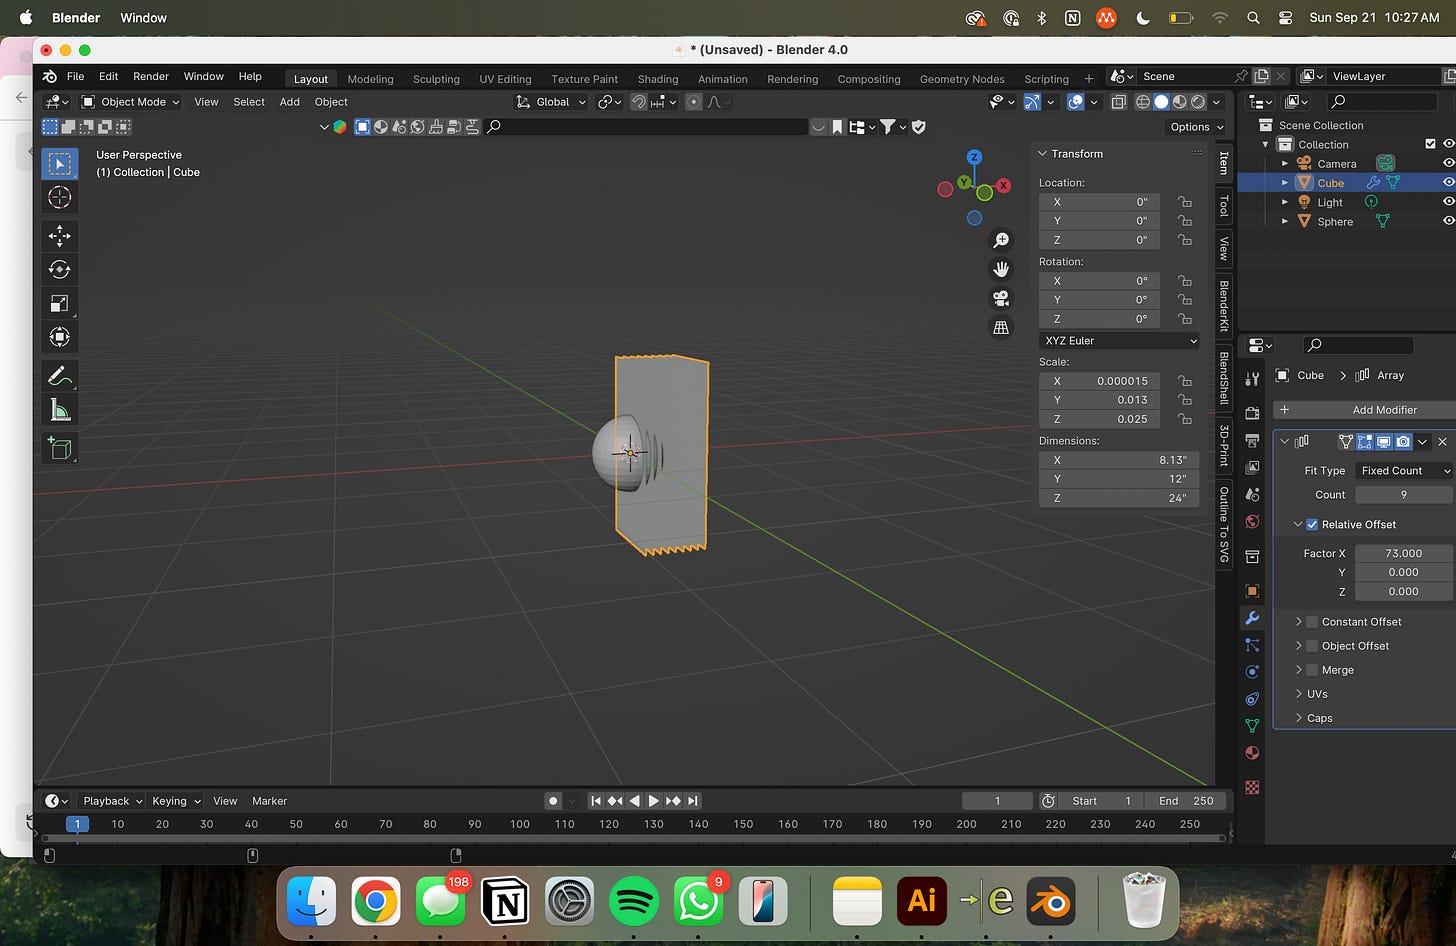
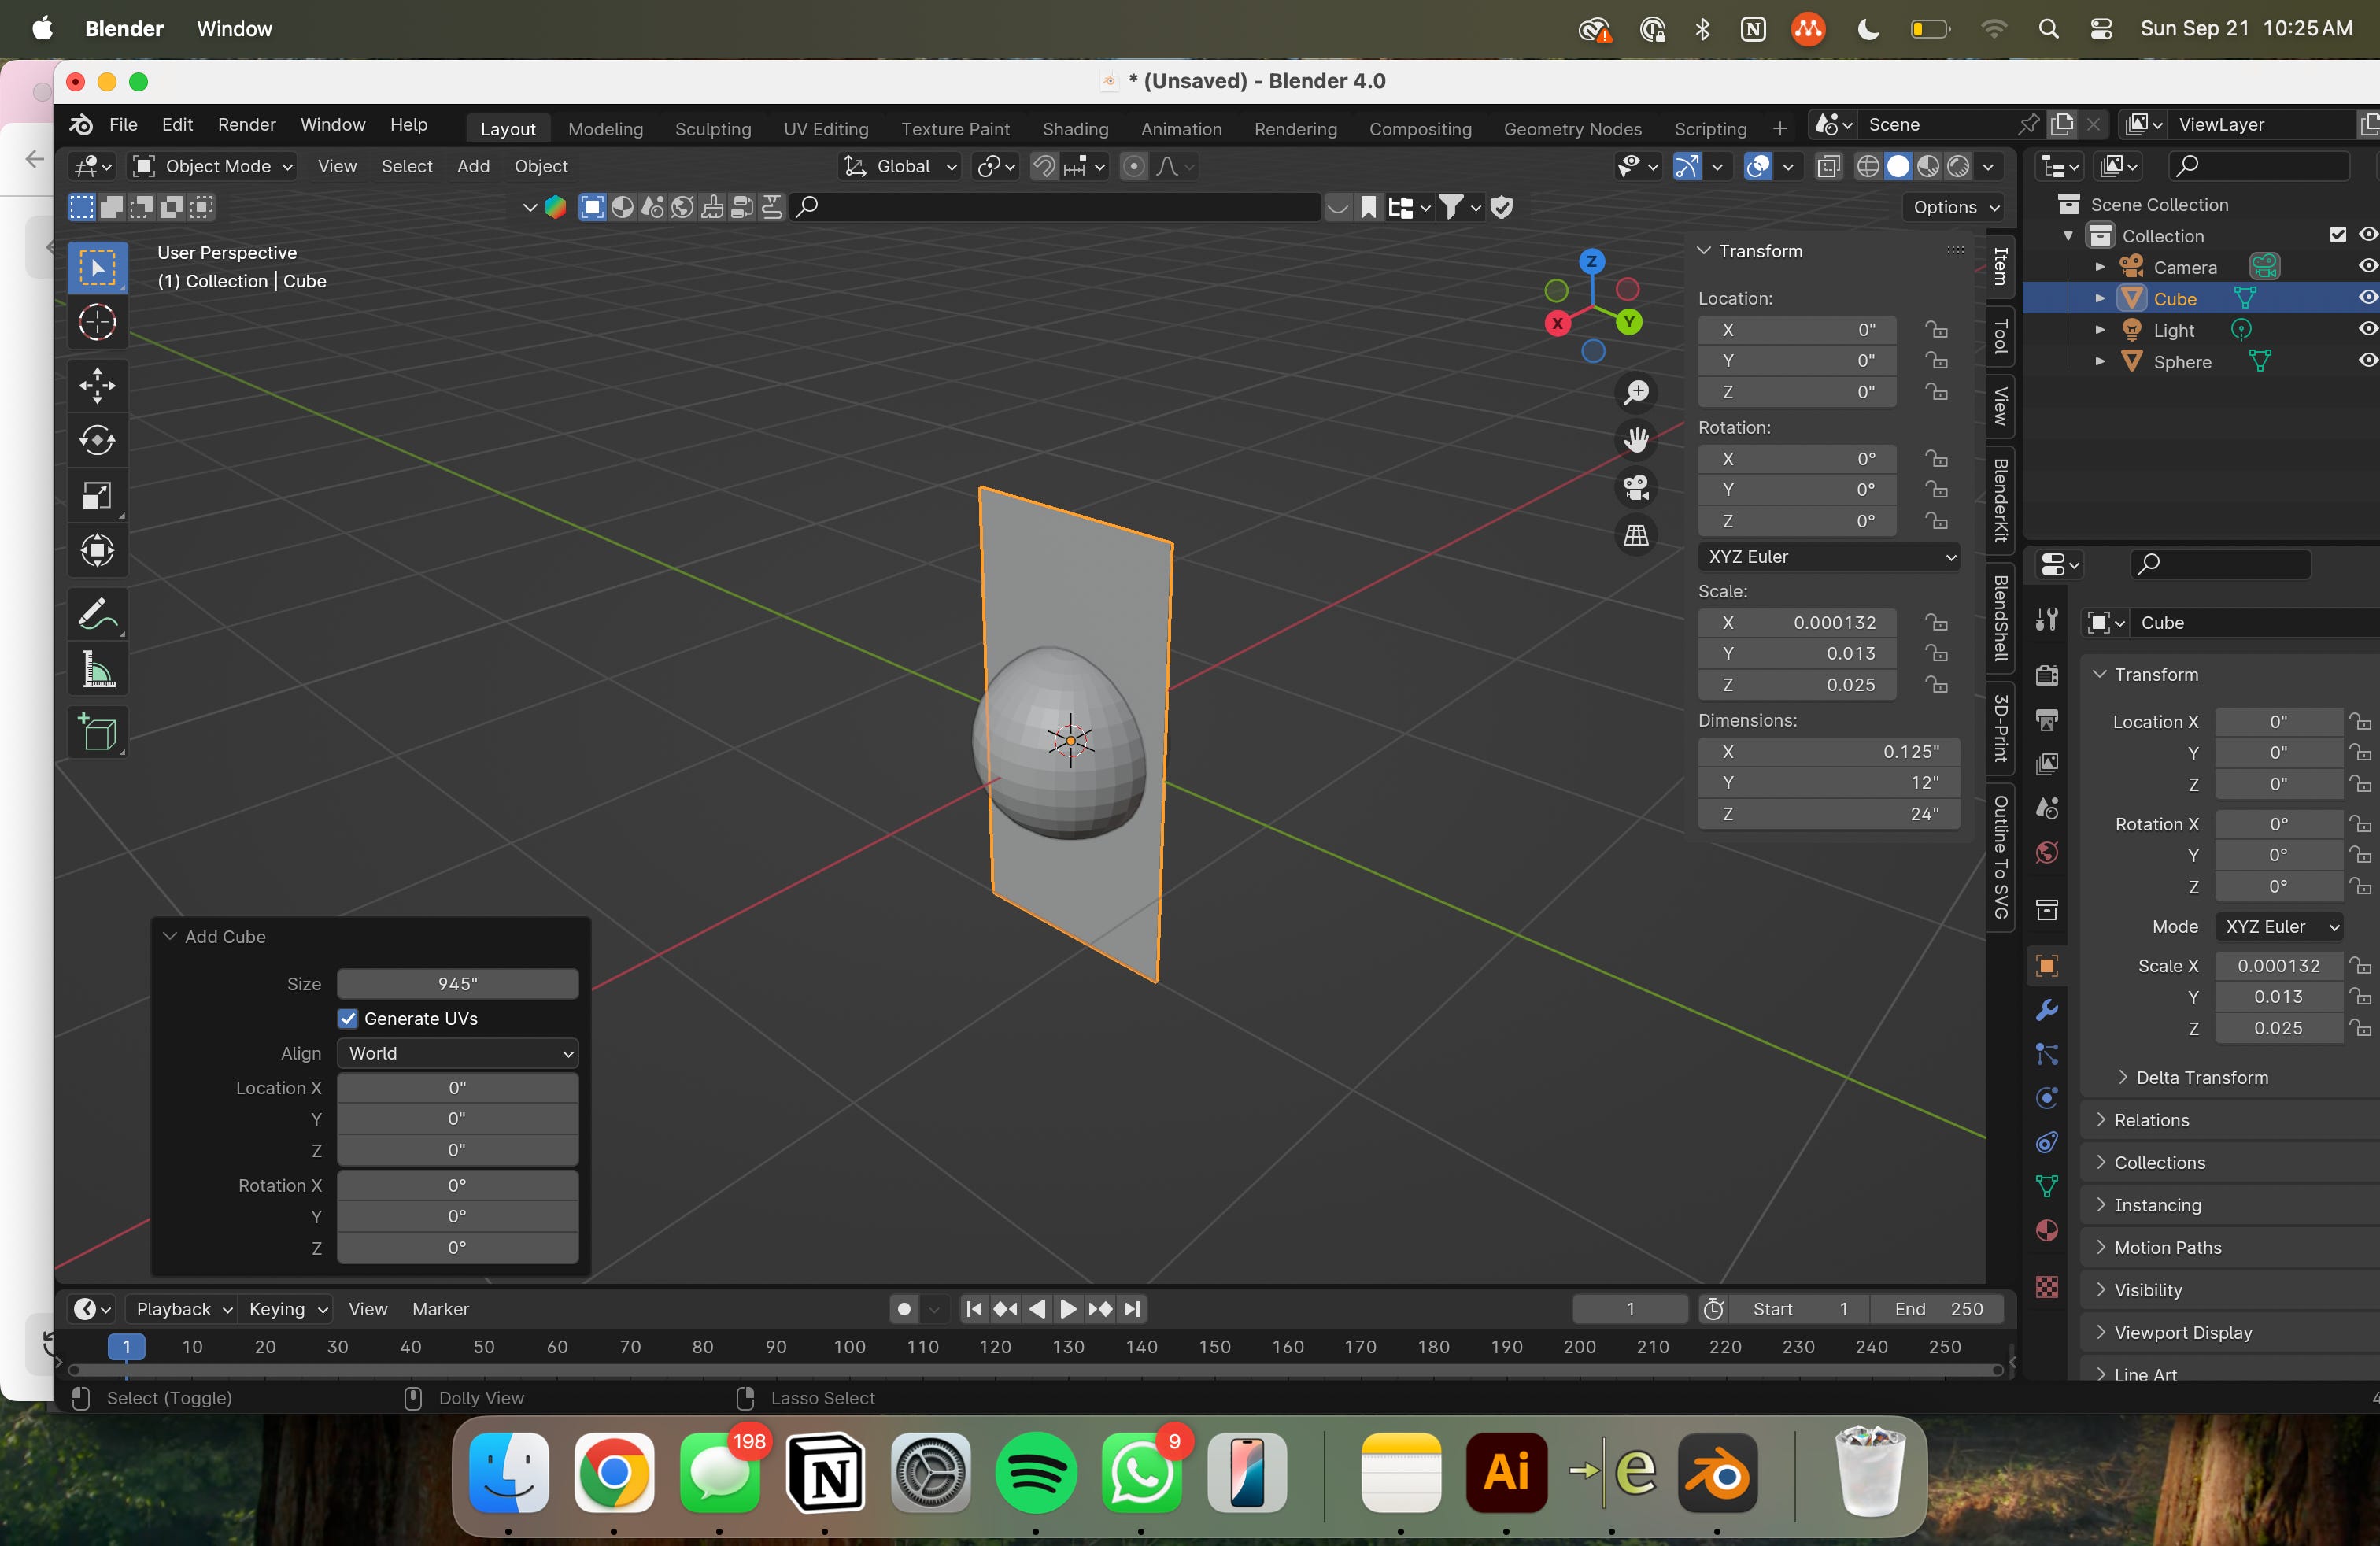
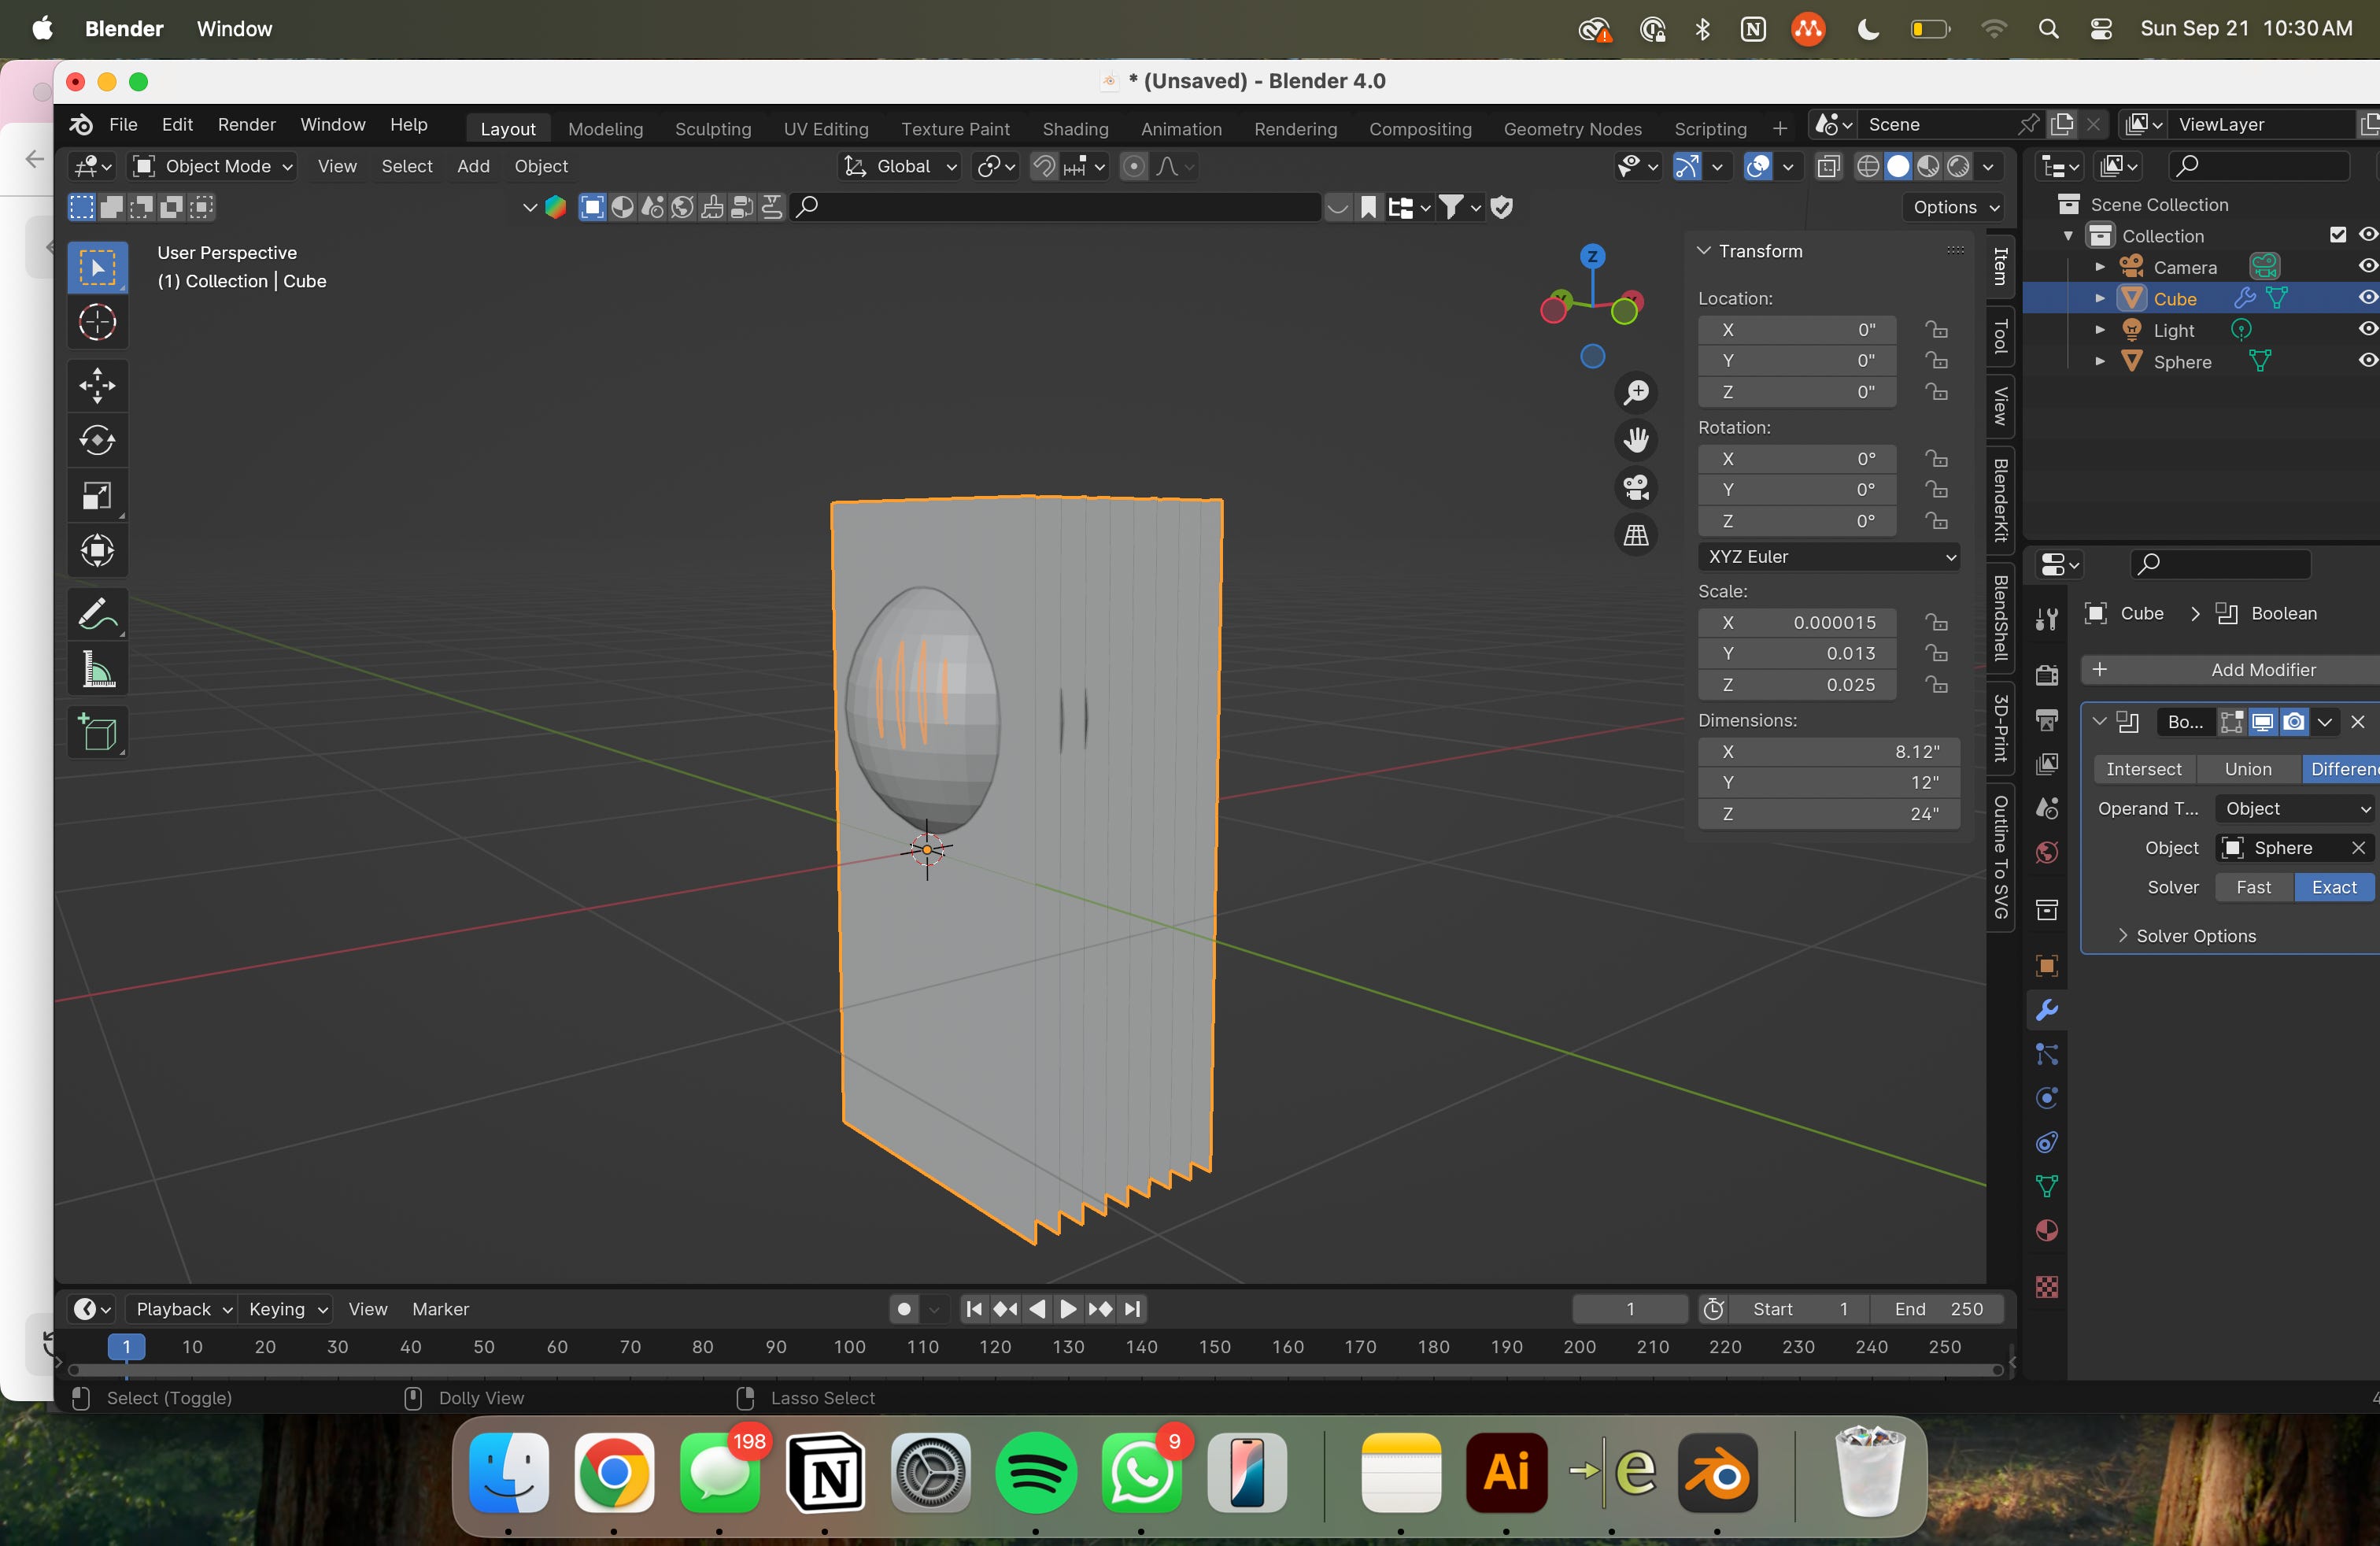
Add (Shift + A) a cube mesh with 24” H x 12” W x 1/8” L.

Create and apply an array modifier to duplicate your cube mesh eight times (yields nine total panels). The panels should have 1” of space between them.
Grab (G Z) the sphere and adjust its vertical location with respect to the panels. This is up to personal preference.
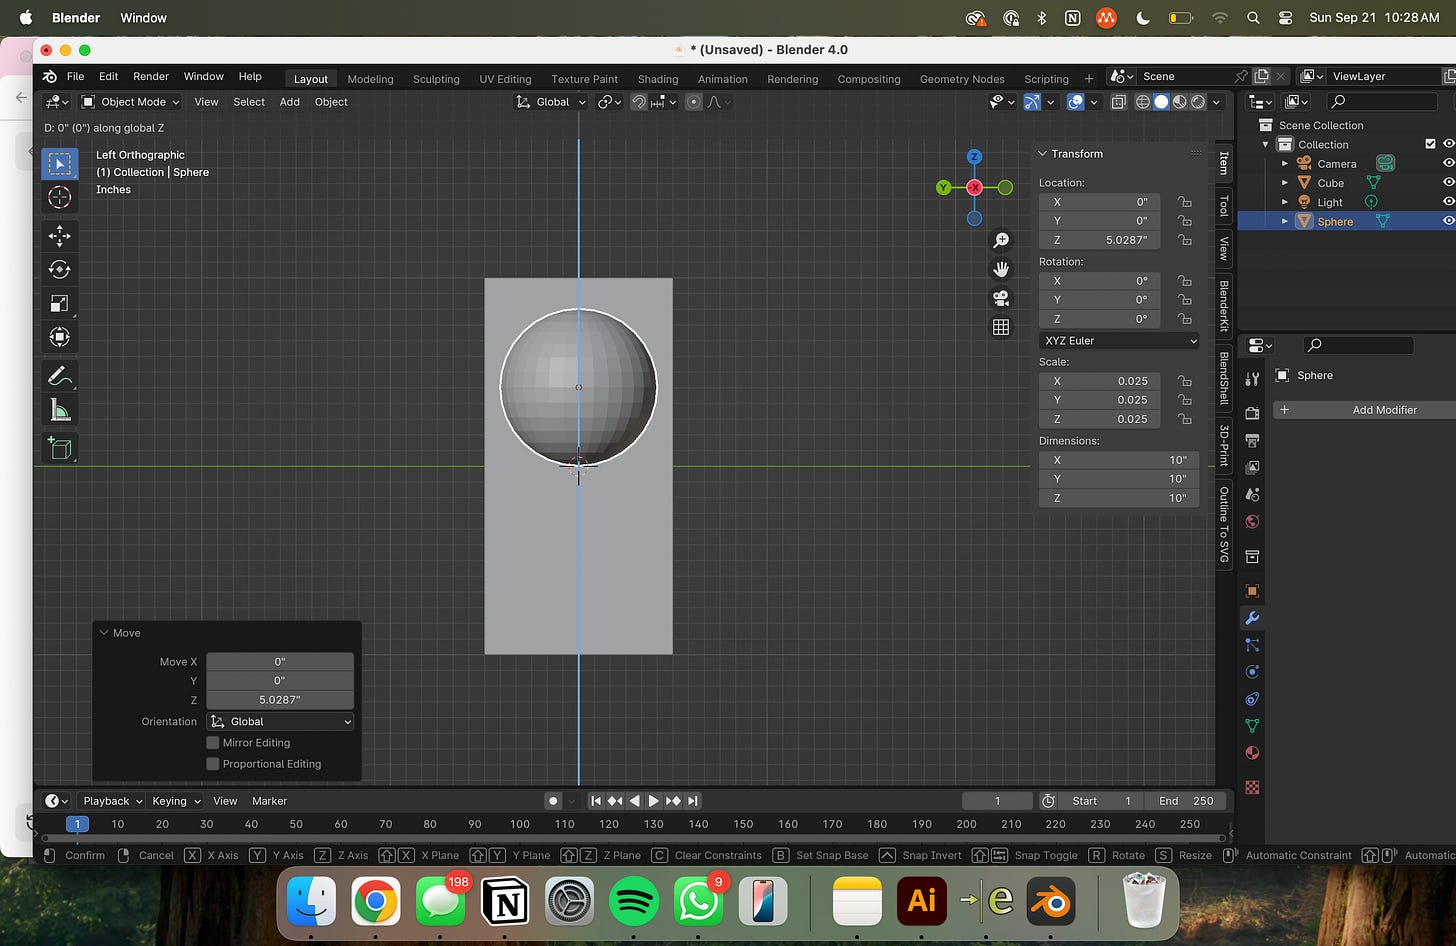
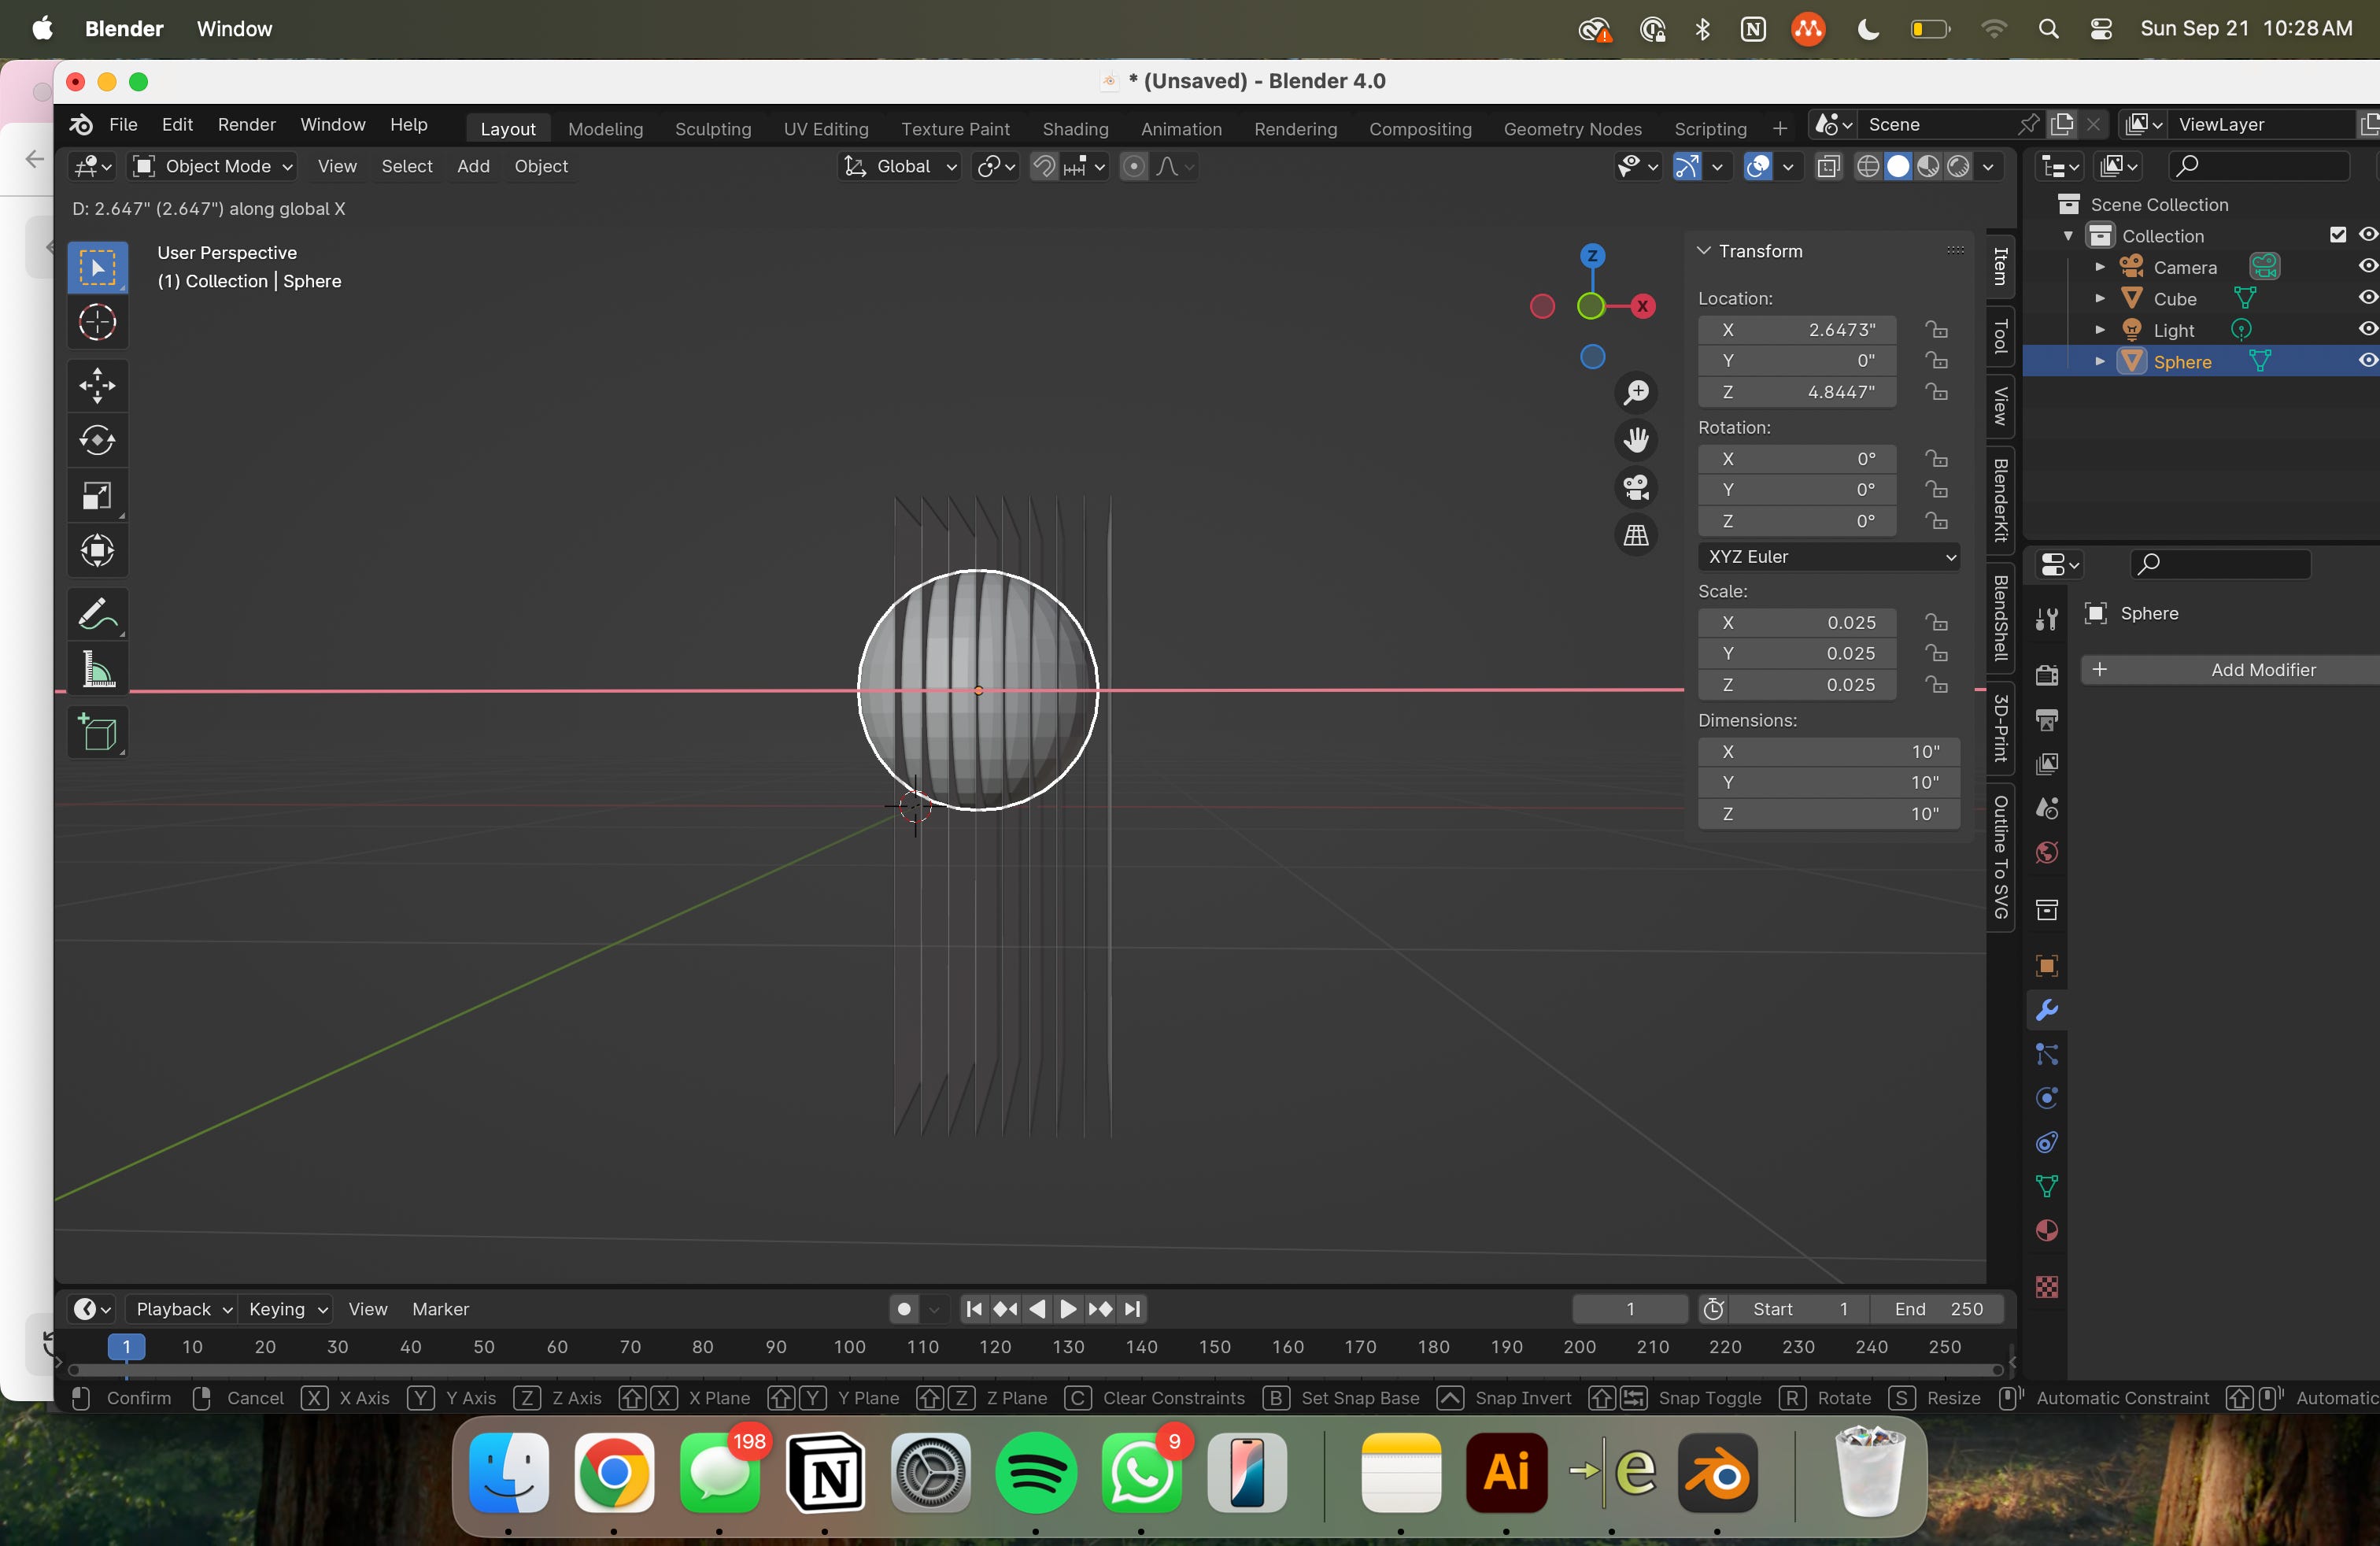
Grab (G X/Y) the sphere and adjust its location with respect to panel depth. Make sure the sphere goes through the eighth panel, but not the ninth.

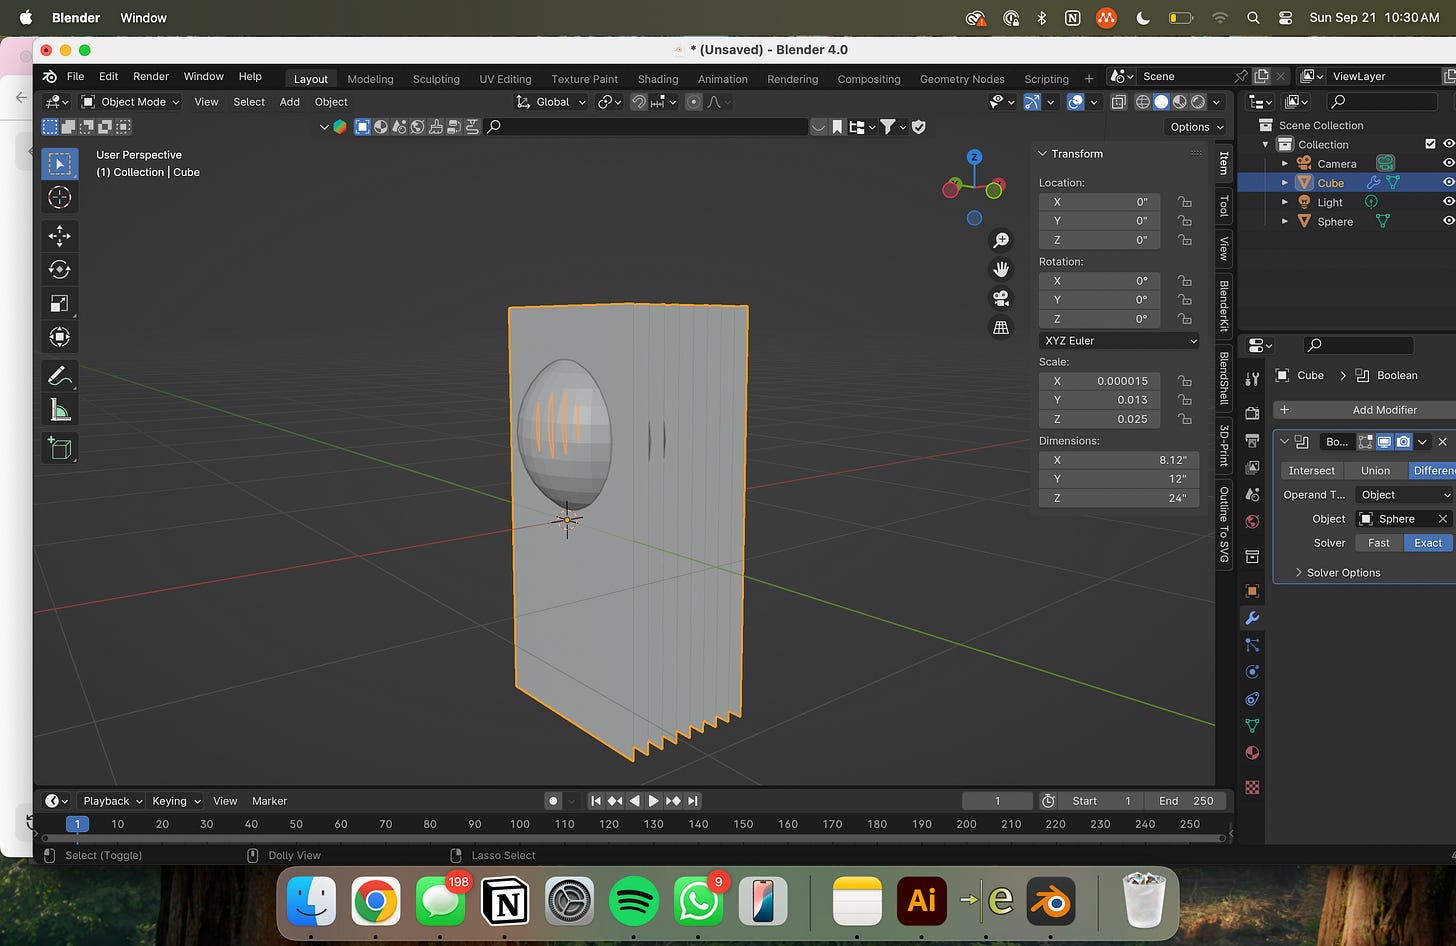
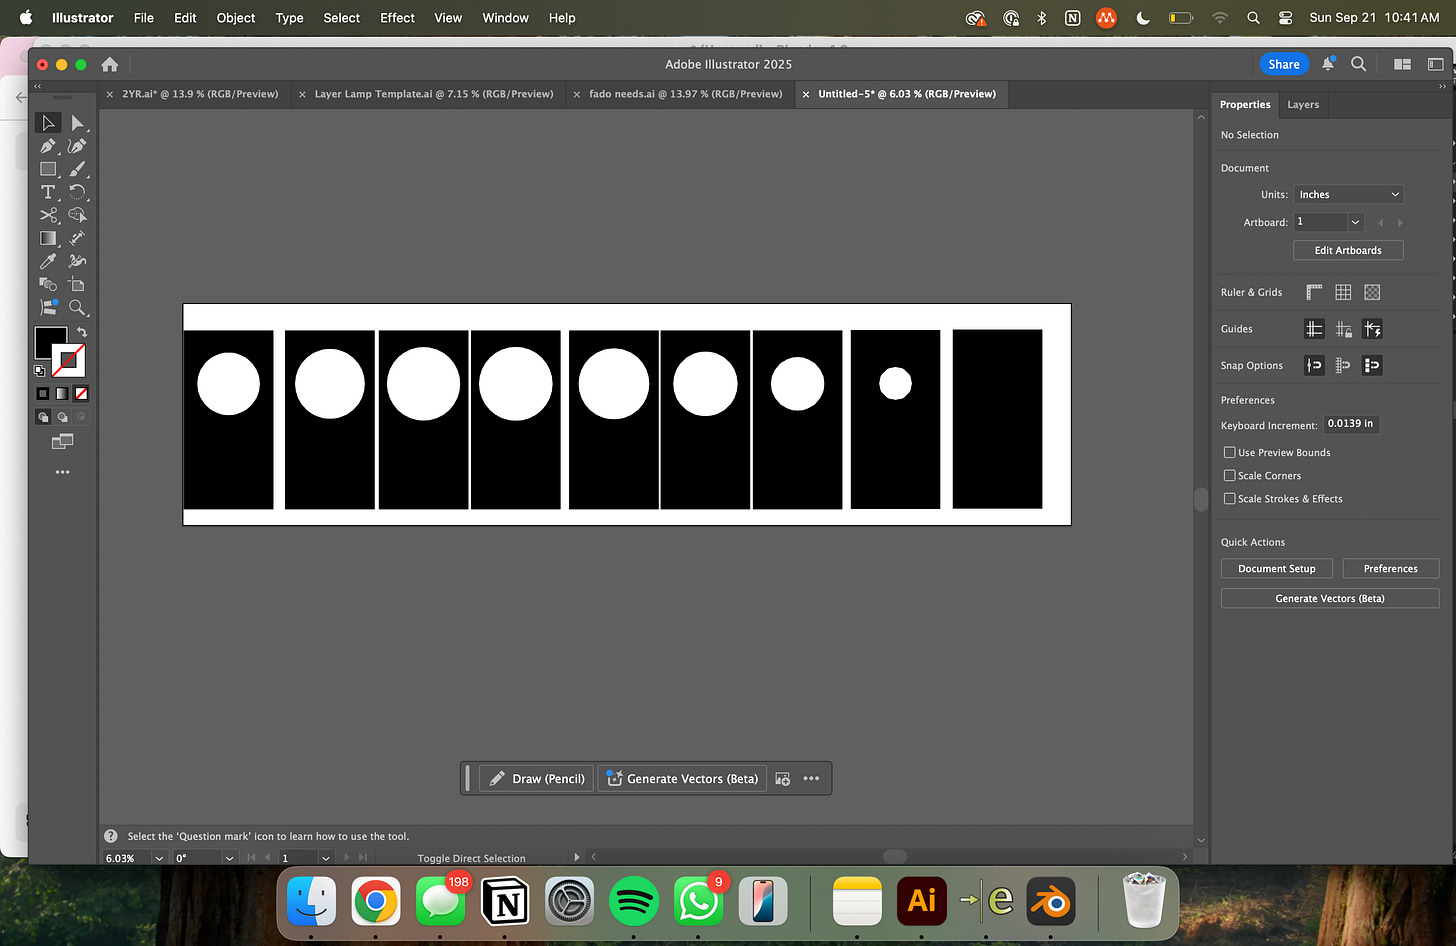
Create and apply a Boolean modifier to the panel array. Select the “difference” mode and use the eyedropper tool to select the sphere.
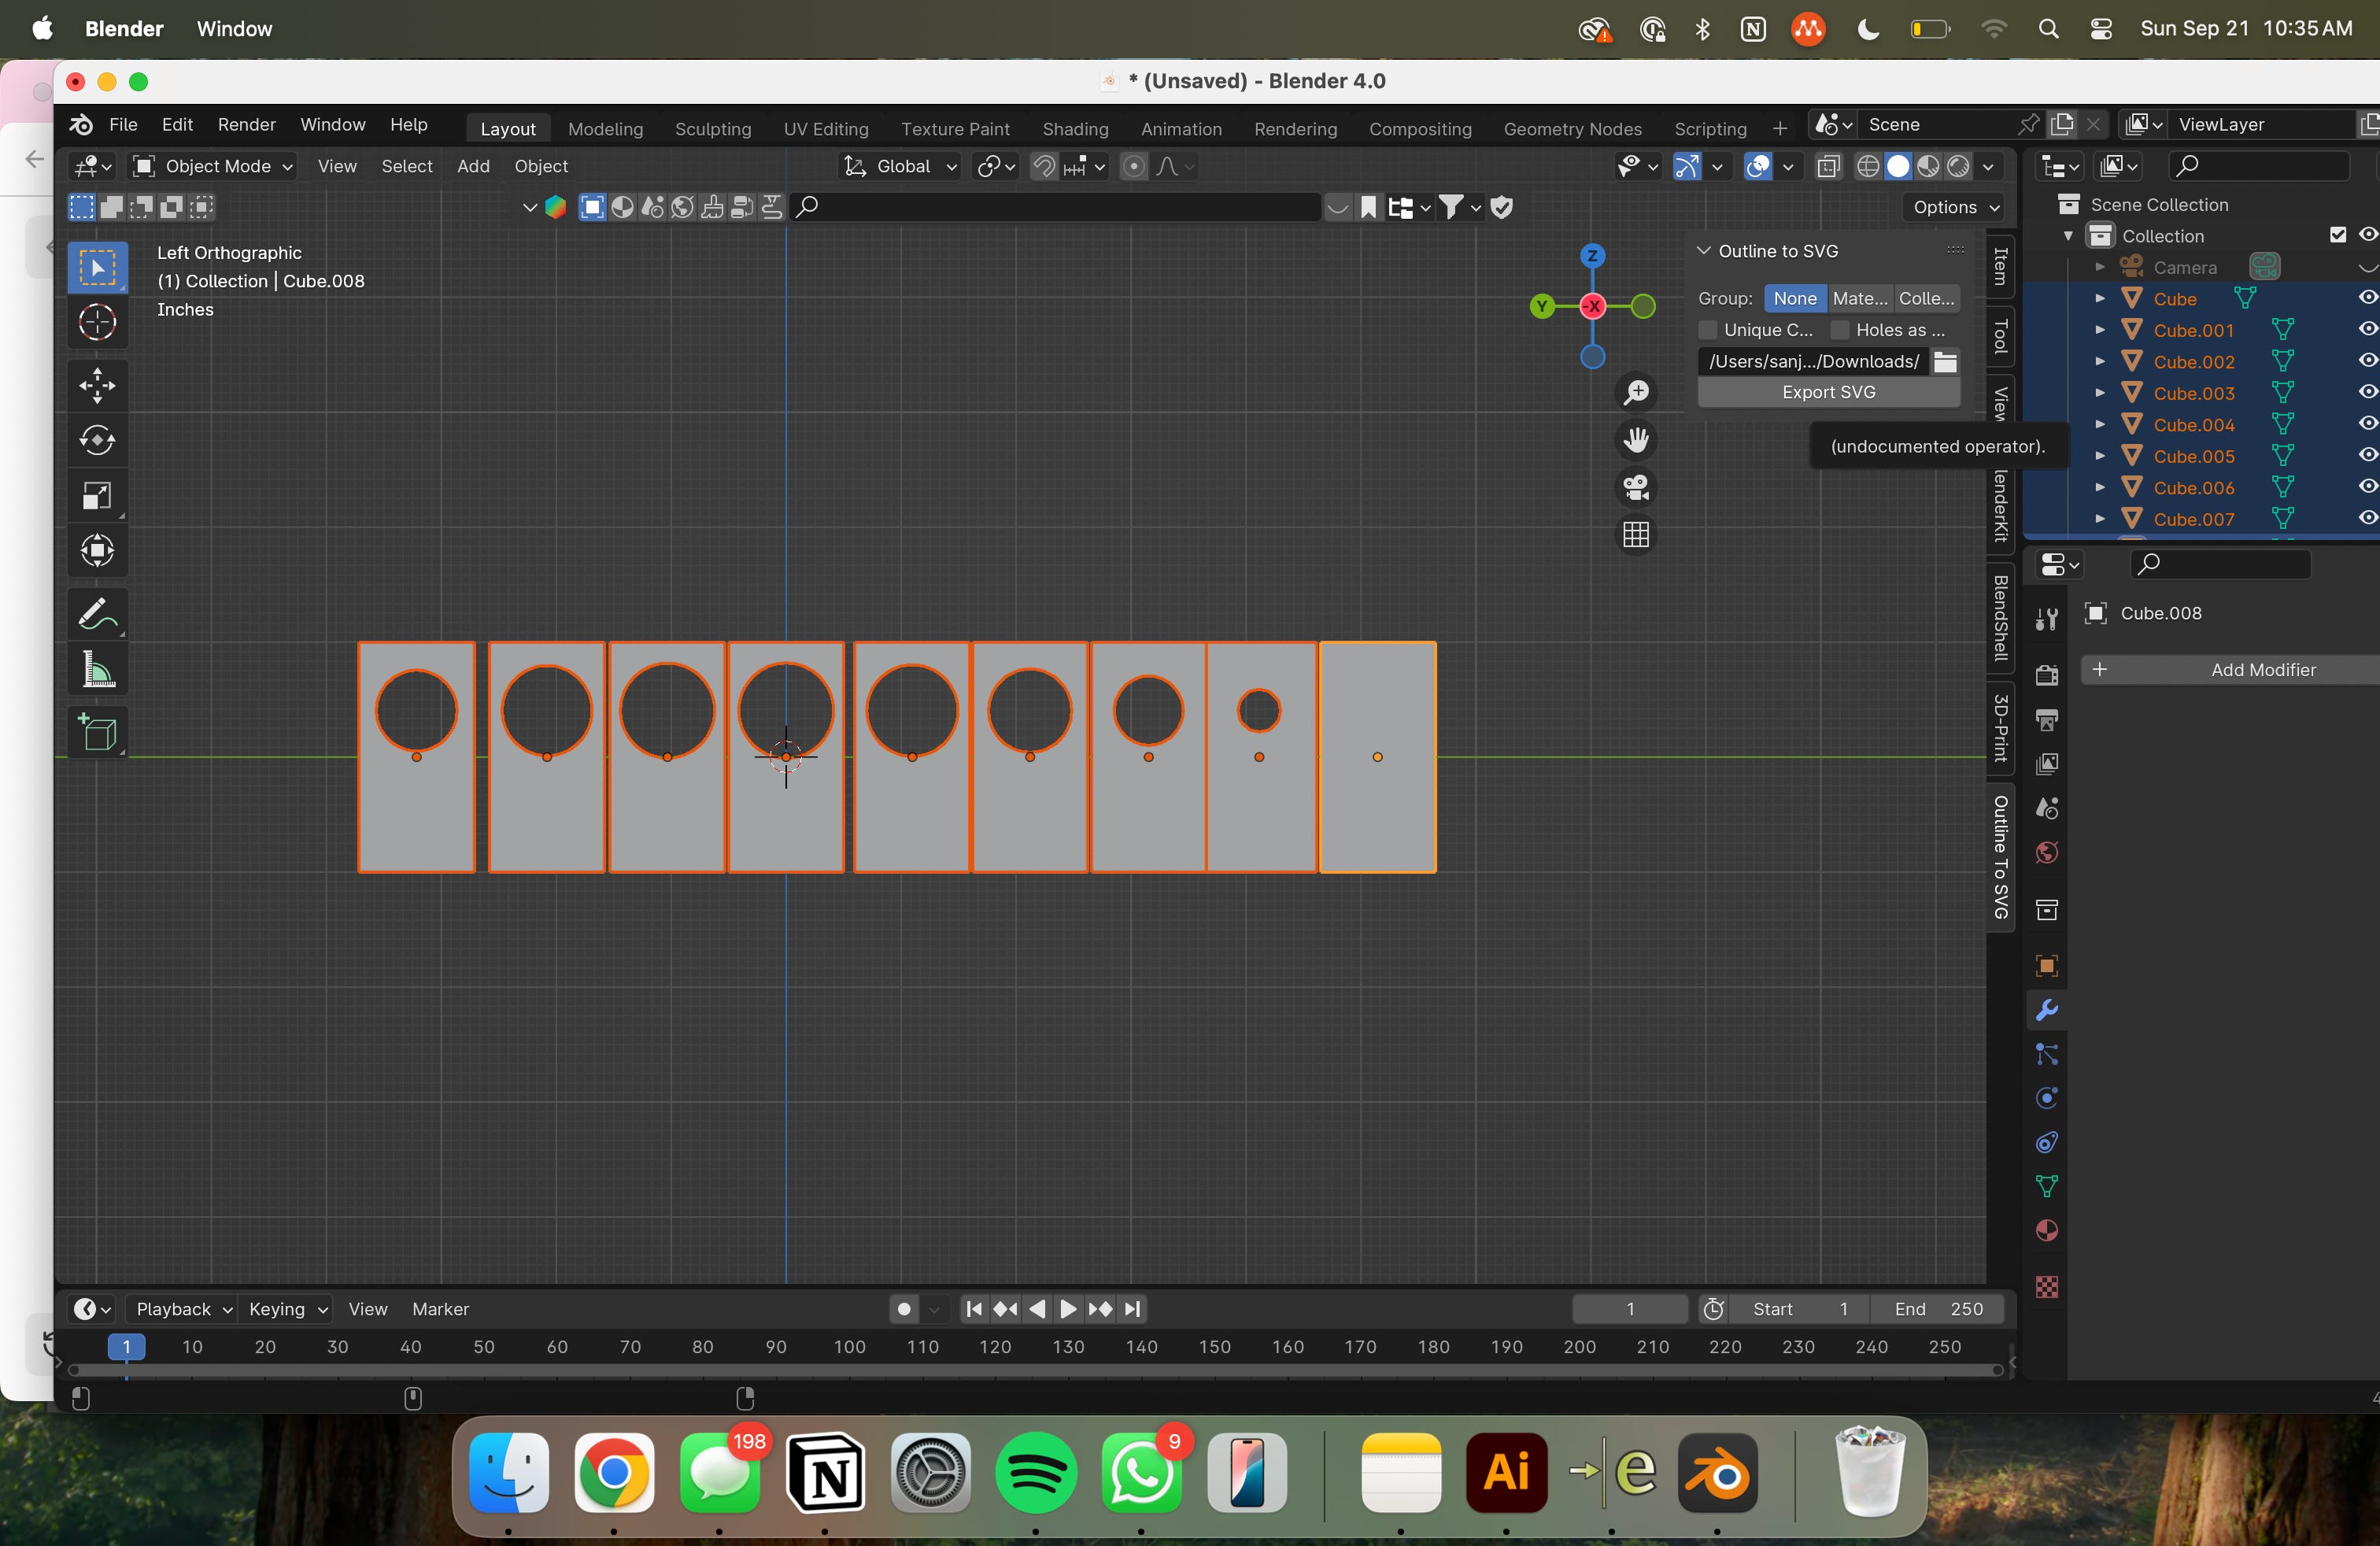
Select the panel array and enter edit mode (TAB). Press “P” > “By Loose Parts” to separate the panels from each other.
Delete (Click + X) the sphere.
Grab (G Y) each panel to ensure they are all fully visible from a flat x-axis perspective.

I use an “Outline to SVG” Blender add-on to convert a camera perspective to an editable SVG file. Select the add-on tab, select all your panels, and choose a location/file name for export. Click “Export SVG”. Let’s move on to Illustrator!


adobe illustrator instructions
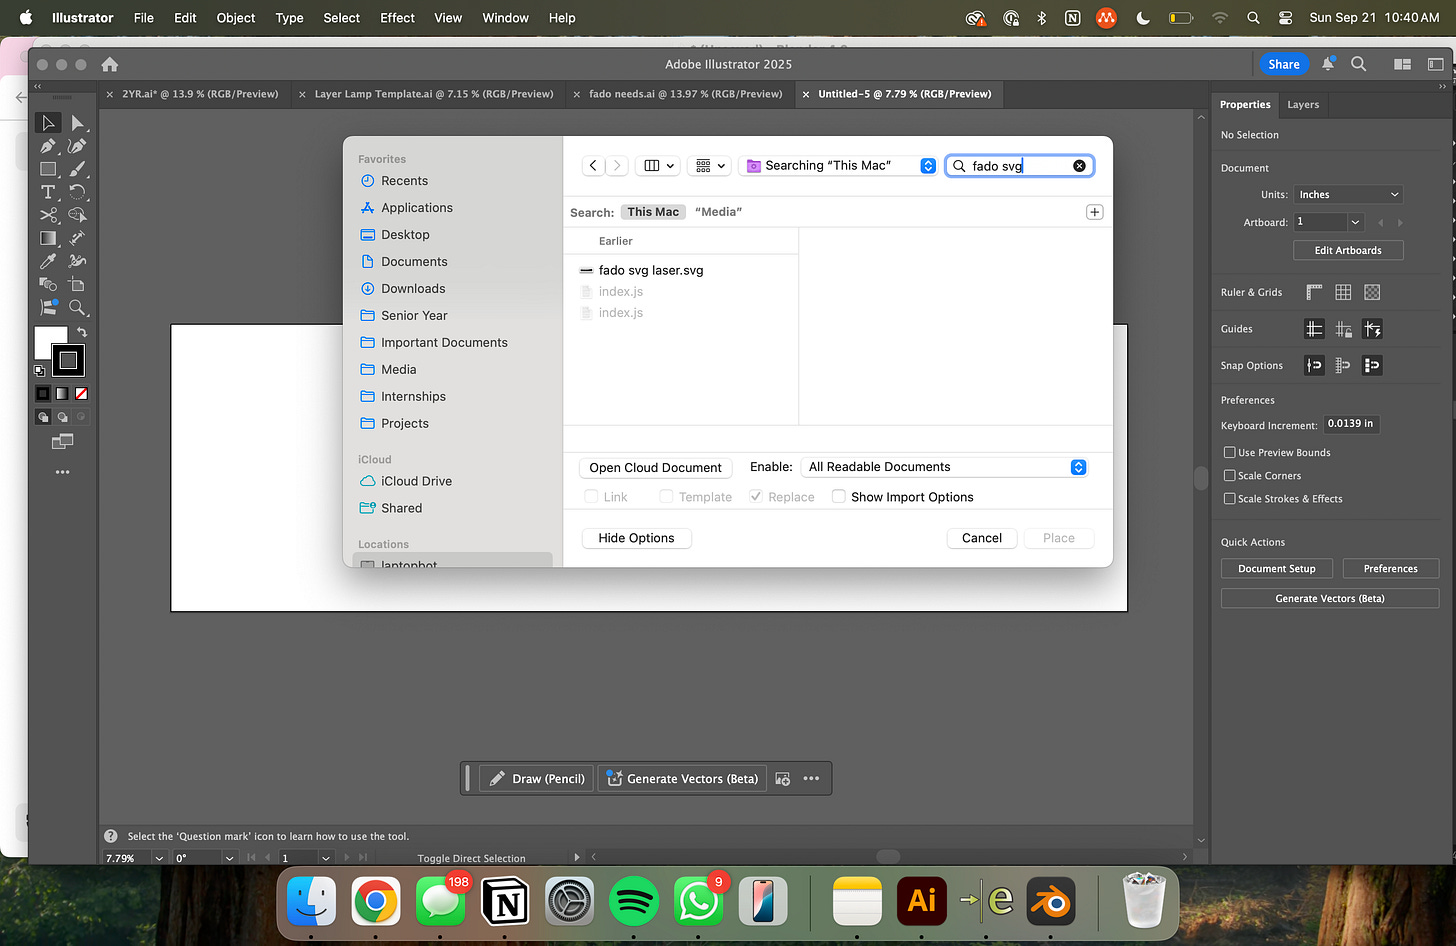
In a new file, open (CTRL + SHIFT + P) your SVG.
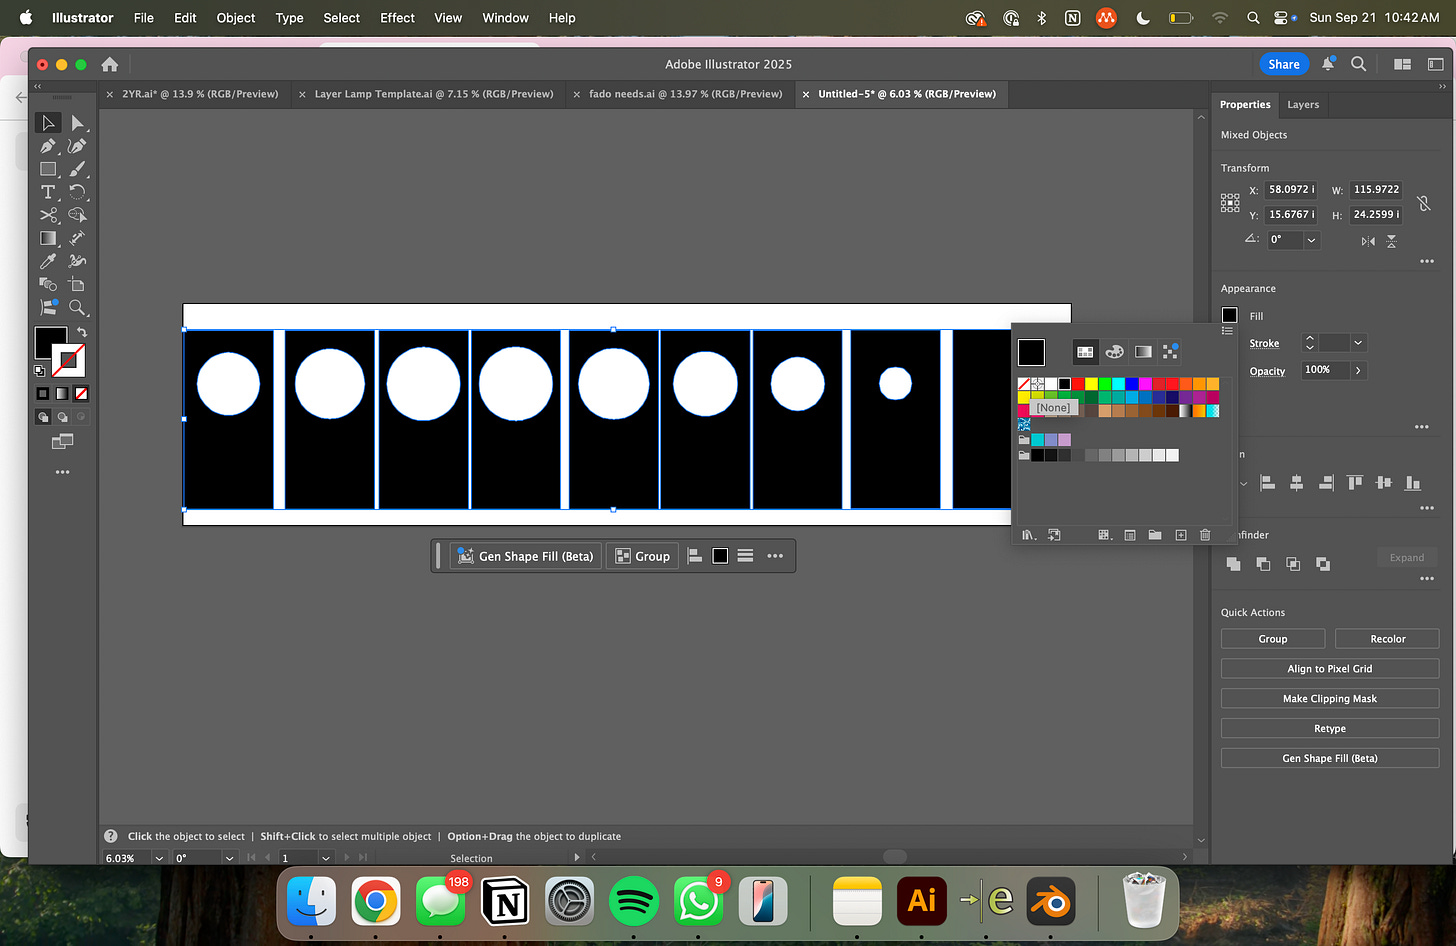
Select all shapes and remove the fill color. Change the stroke color and width according to your laser cutter’s “cut” settings. My machine is programmed to cut lines that have a 1pt stroke in black.
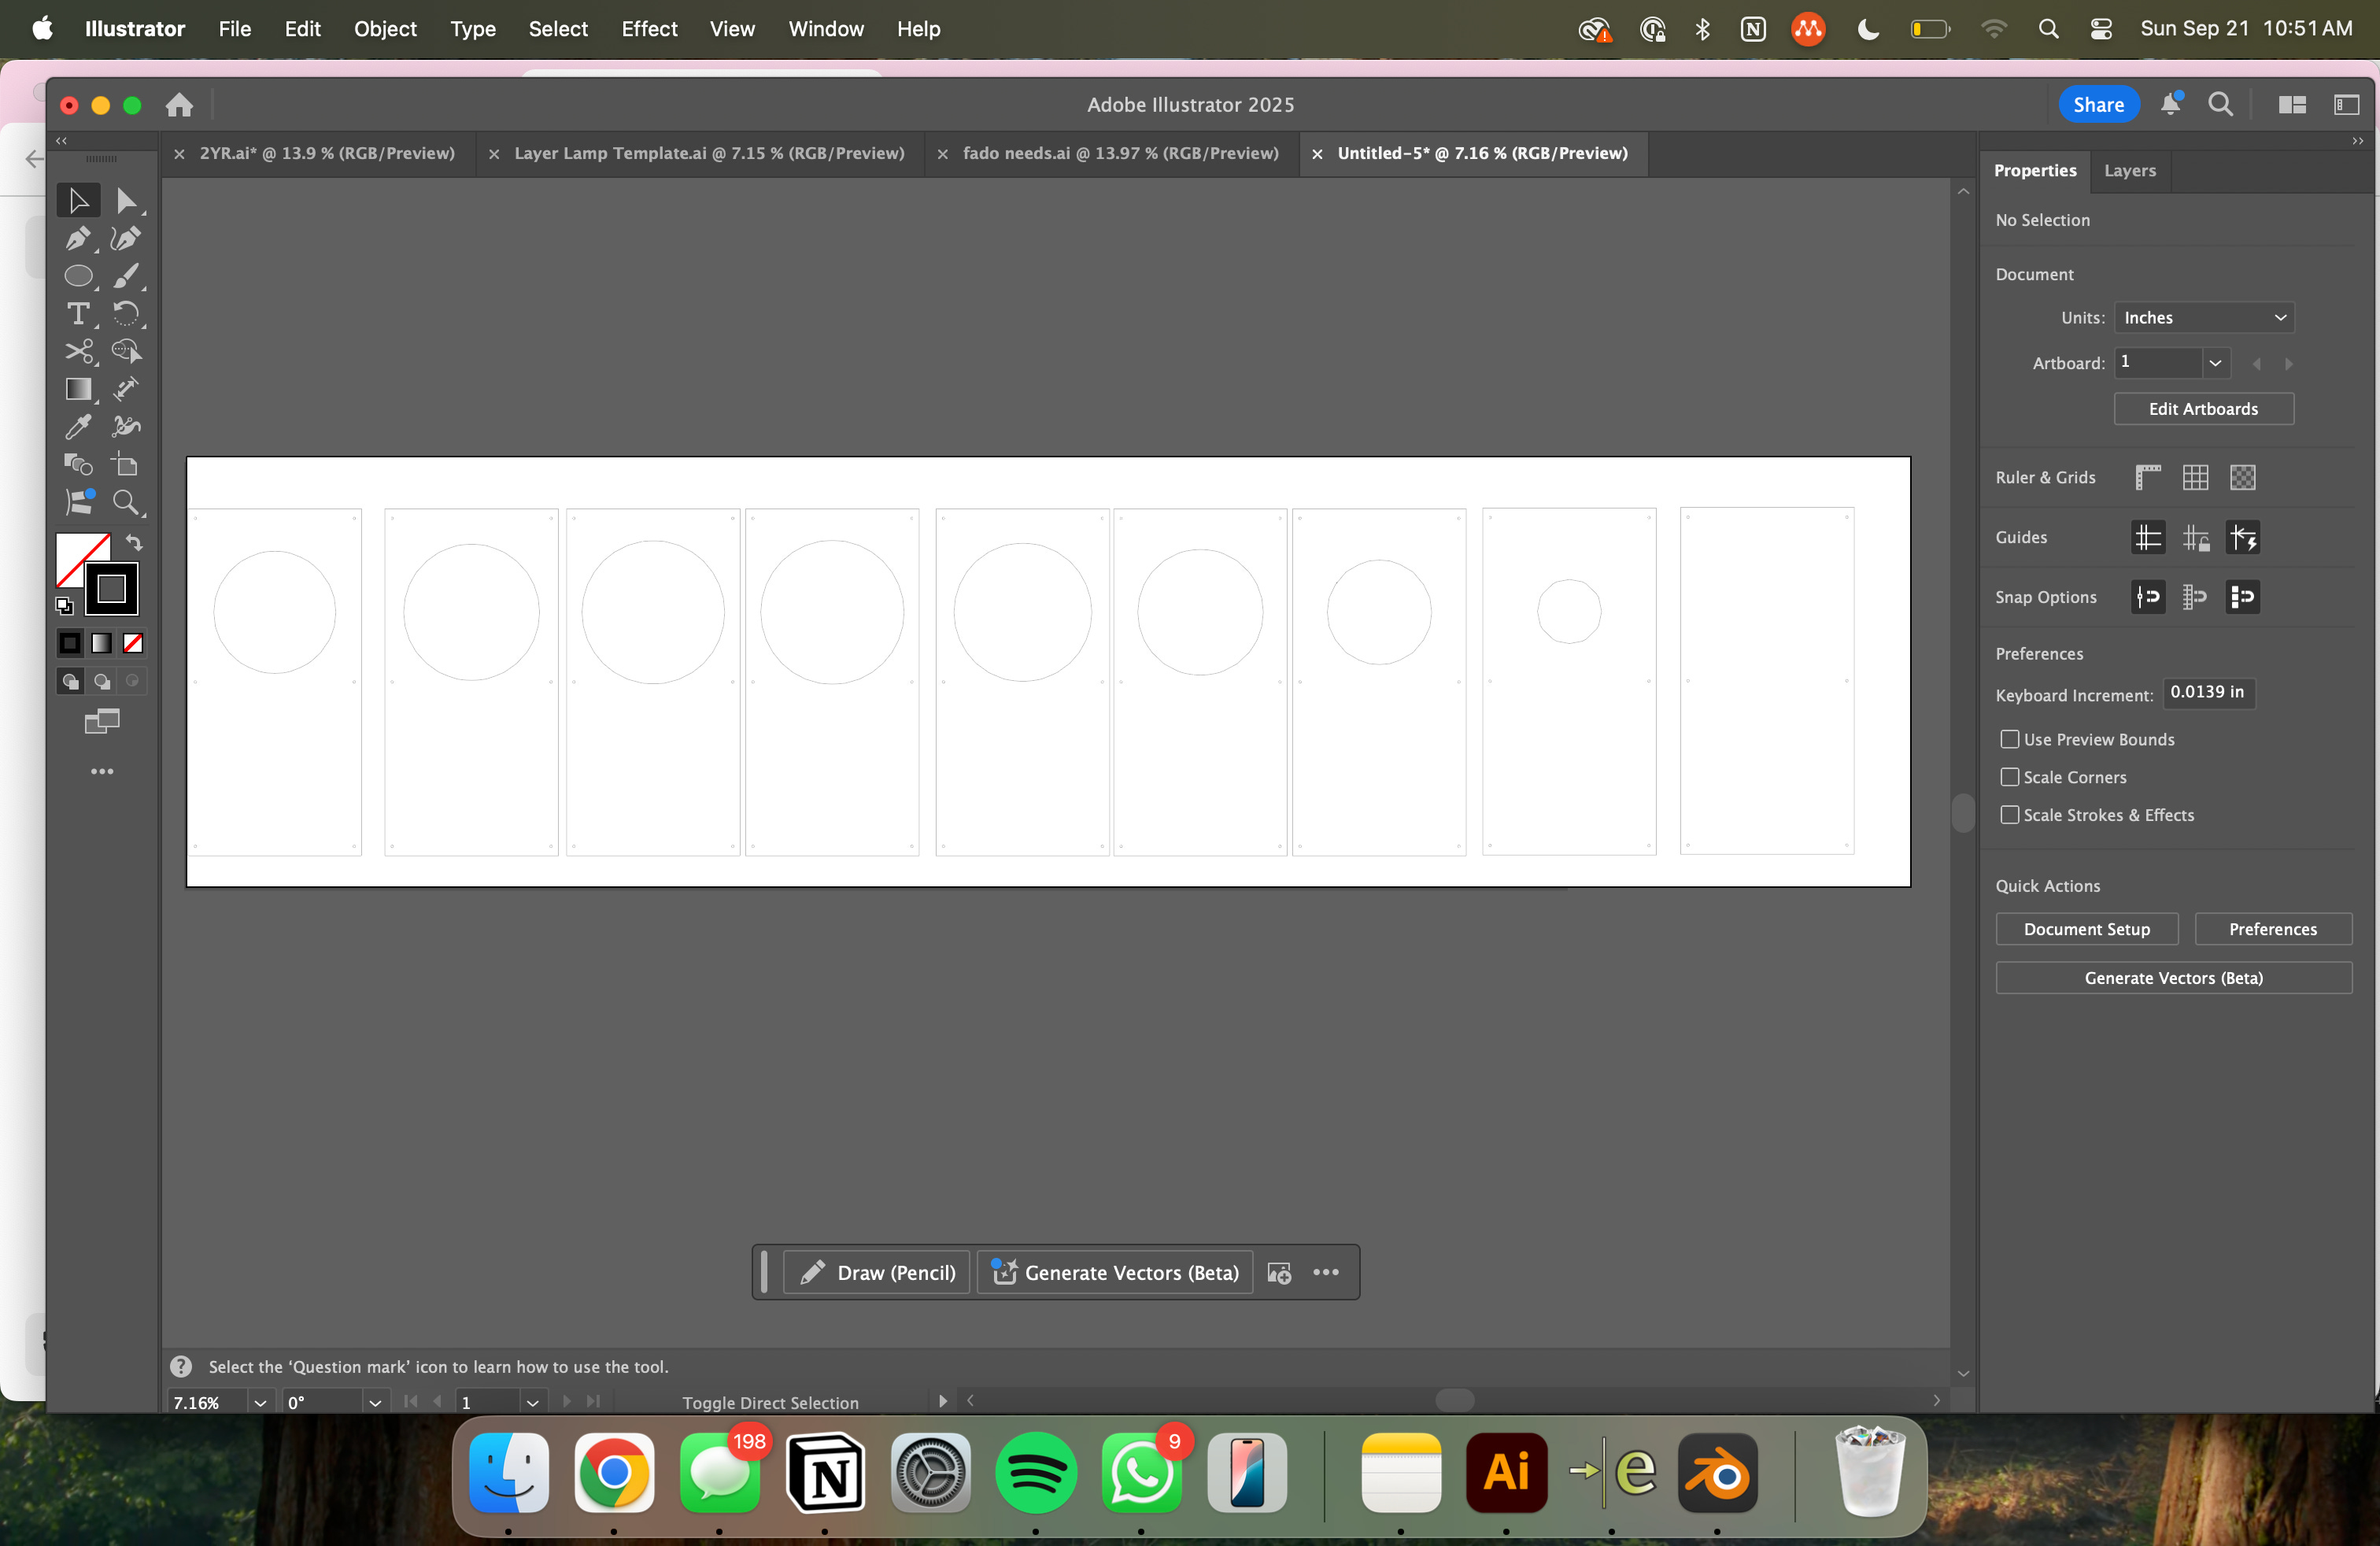
We now need to add screw holes. Create a circle with a .18” diameter—this will allow 8-32” rods to be inserted. M4 rods may also work with these holes, but you’ll probably want to adjust the hole size for the hardware you have.
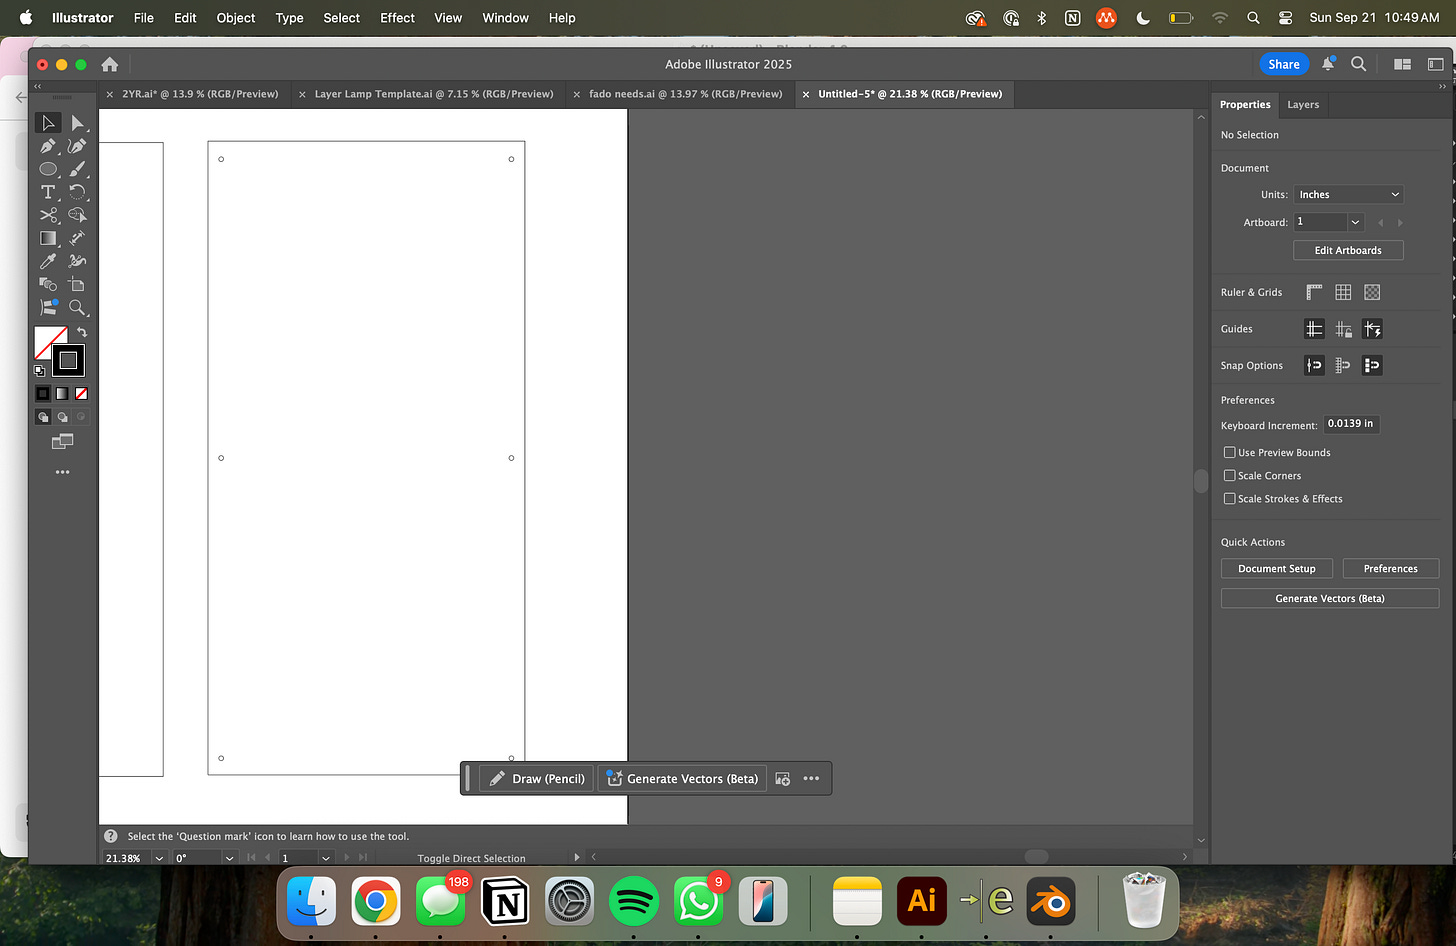
Create six holes on any panel to allow for the threaded rods. Group them and copy/paste to the eight other panels. Make sure the hole pattern is centered on each panel to avoid any misalignment during assembly.

Export your file as a DXF. It is now ready to be transferred to your laser cutter.


final assembly
Screw cap nuts onto the end of each threaded rod.
Push the rods through the bottom-most panel.
Add 1-inch spacers onto each threaded rod.
Alternate between putting spacers and panels onto the threaded rods until you reach the top panel.
After the second panel is installed, place the lamp base and lightbulb.
After the fourth panel is installed, place the lamp shade.
Optionally, you can trim the threaded rods with a metal saw and finish with six more cap nuts.
To properly secure the shade to the base (or to replace the lightbulb), unscrew the bottom two panels.
Transformative! Do VARMBLIXT next!